- Skip to primary navigation
- Skip to main content
- Skip to primary sidebar

- FREE Experiments
- Kitchen Science
- Climate Change
- Egg Experiments
- Fairy Tale Science
- Edible Science
- Human Health
- Inspirational Women
- Forces and Motion
- Science Fair Projects
- STEM Challenges
- Science Sparks Books
- Contact Science Sparks
- Science Resources for Home and School

Light Refraction Experiment
March 30, 2020 By Emma Vanstone Leave a Comment
This light refraction experiment might be one of the most simple to set up science experiments we’ve ever tried. It is a bit tricky to explain, but impressive even if you can’t quite get your head around it!
If you like this activity don’t forget to check out out our other easy science experiments for kids .
Materials for Light Refraction Experiment
Paper or card
Instructions
Fill the glass almost to the top.
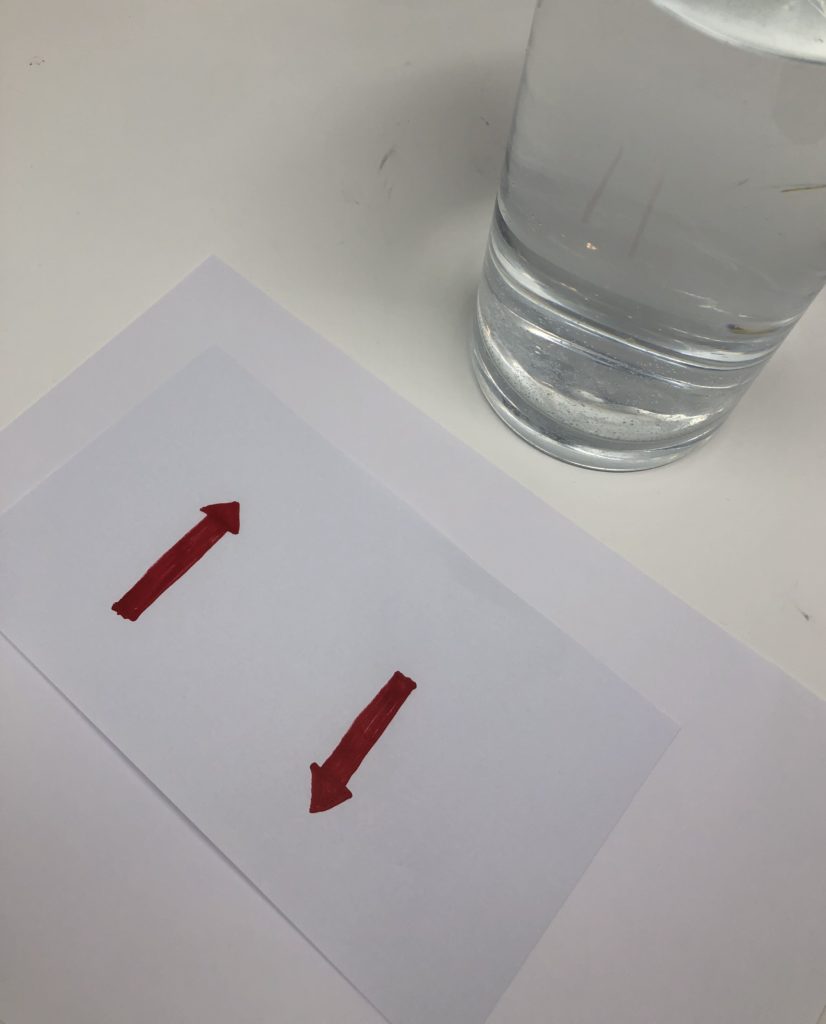
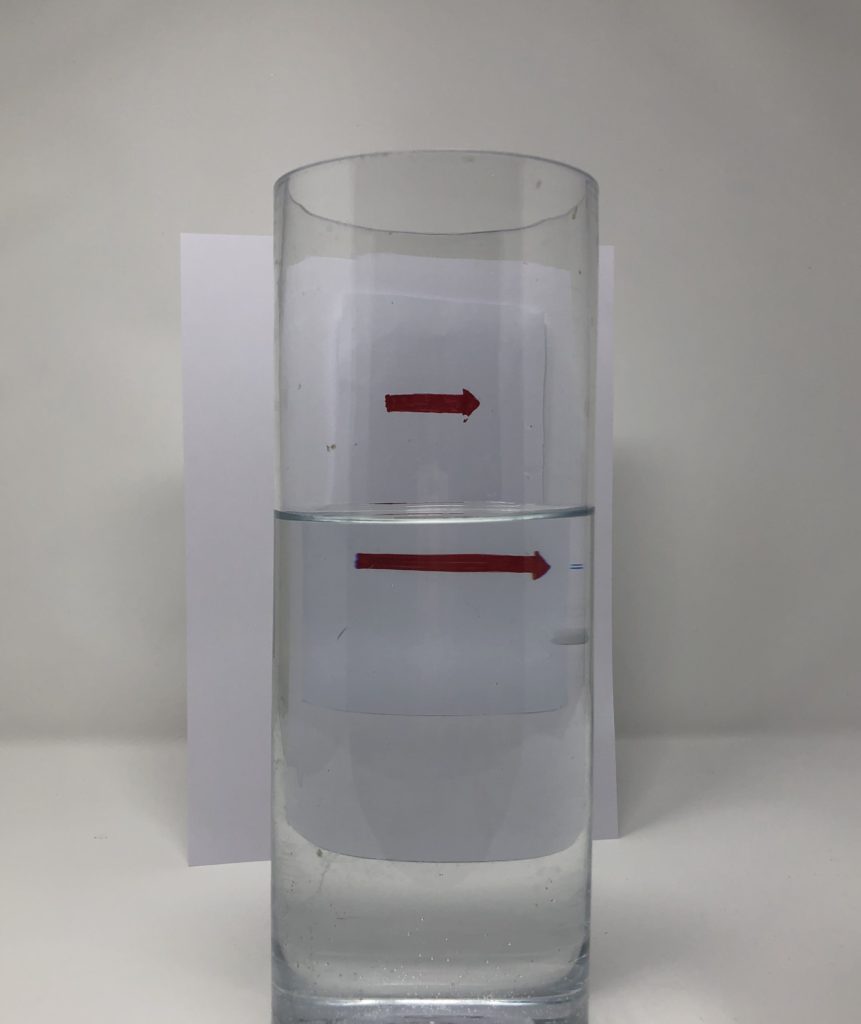
Draw arrows on one piece of of card or paper. Place the paper behind the glass and watch as the arrow points the other way.
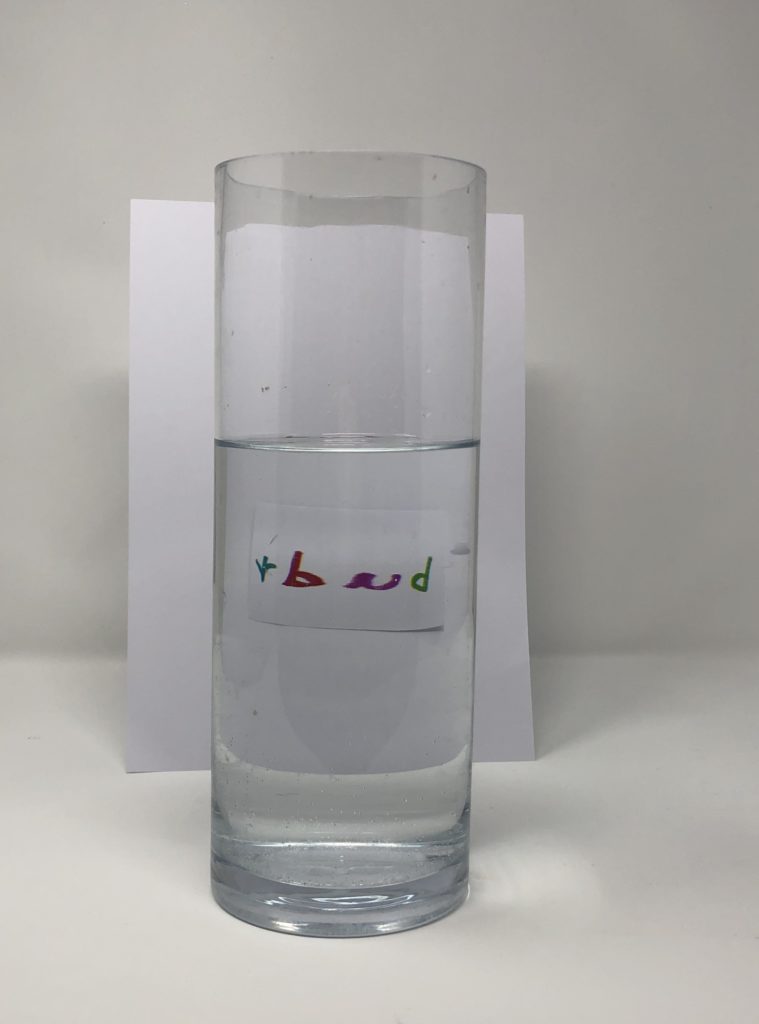
Now try to think of a word that still makes sense if you put it behind the glass.
We tried bud , the green ( badly drawn ) plant is on the opposite side when the paper is not behind the glass.
NOW works well too 🙂
How does this work?
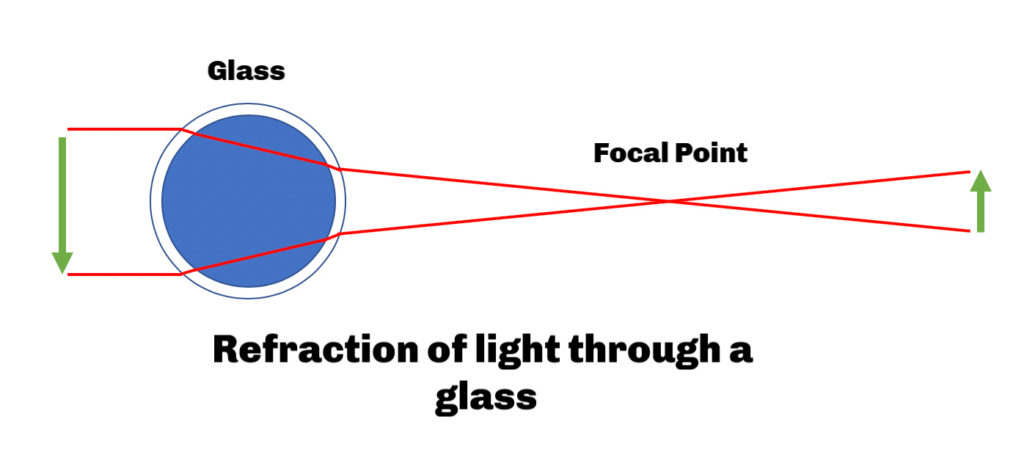
Refraction ( bending of light ) happens when light travels between two mediums. In the refraction experiment above light travels from the arrow through the air, through the glass, the water, the glass again and air again before reaching your eyes.
The light reaching your eye (or in this case our camera) coming from the arrow is refracted through the glass of water. In fact the glass of water acts like a convex lens (like you might have in a magnifying glass). Convex lenses bend light to a focal point . This is the point at which the light from an object crosses.
The light that was at the tip of the arrow is now on the right side and the light on the right side is now on the left as far as your eye is concerned (assuming you are further away from the glass than the focal point.
If you move the arrow image closer to the glass than the focal point it will be the way around you expect it to be!
More Refraction experiments
Create an Alice in Wonderland themed version of this too!
Find out how to make your own magnifying glass .
We’ve also got a fun disappearing coin trick .
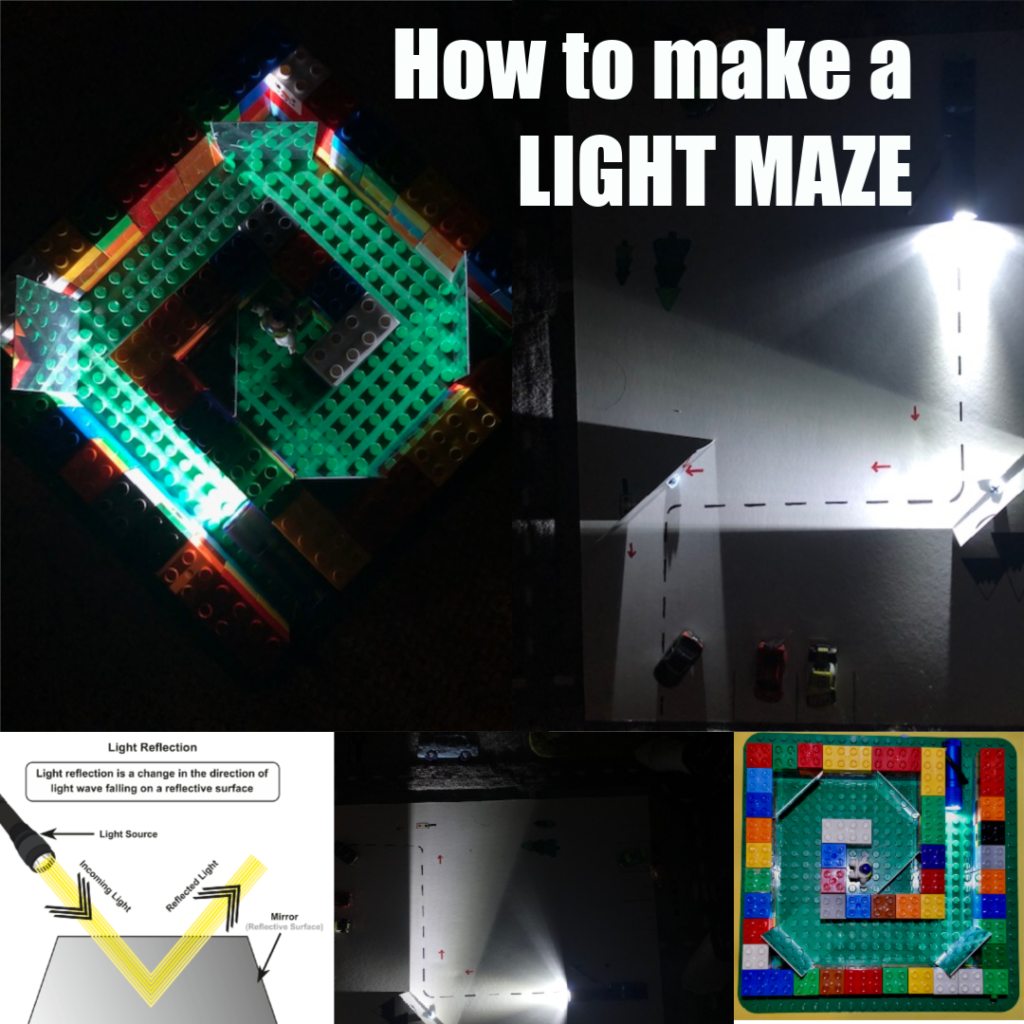
Or try our light maze to learn about reflection .
Last Updated on February 22, 2021 by Emma Vanstone
Safety Notice
Science Sparks ( Wild Sparks Enterprises Ltd ) are not liable for the actions of activity of any person who uses the information in this resource or in any of the suggested further resources. Science Sparks assume no liability with regard to injuries or damage to property that may occur as a result of using the information and carrying out the practical activities contained in this resource or in any of the suggested further resources.
These activities are designed to be carried out by children working with a parent, guardian or other appropriate adult. The adult involved is fully responsible for ensuring that the activities are carried out safely.
Reader Interactions
Leave a reply cancel reply.
Your email address will not be published. Required fields are marked *
Most Popular Activity: STRAW ROCKETS

Most Popular Activity: Straw Rockets
Light Science for Kids: Ways to Explore Refraction and Reflection
As an Amazon Associate I earn from qualifying purchases. You can read more on our disclosure page .
Here’s a fun collection of light science for kids ! You’ll find light science experiments about both light refraction and light reflection in this science roundup.
Follow our Science for Kids Pinterest board!
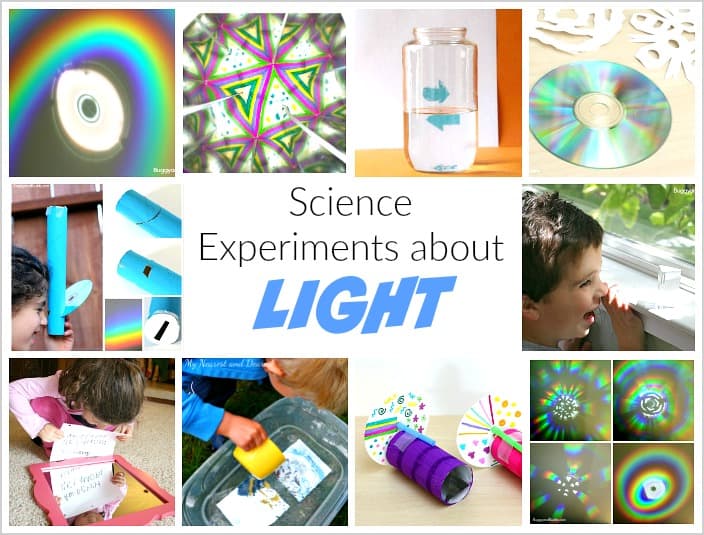
Because we have been having so much fun with our most recent light science activities, I decided to round up some more fun science ideas for kids having to do with light. You’ll find ideas for examining light refraction (the bending of light) and light reflection (when light bounces off an object) in this collection, as well as science experiments for various ages- from preschool and on up!
10+ Light Science Activities for Kids
Light refraction and rainbow science.

Make a Spectroscope Using a Cardboard Tube from Buggy and Buddy
Explore Light Patterns with a CD and Paper from Buggy and Buddy
Rainbow Science: Exploring Prisms from Buggy and Buddy

Light Box Magic from True Aim
Making a Rainbow with Water and a Mirror from No Twiddle Twaddle
Light Refraction with Water

Water Refraction Science Experiment from What Do We Do All Day?
How to Make a Magnifying Glass from Science Sparks
Light Reflection and Mirrors

How to Make a Kaleidoscope from Buggy and Buddy
Exploring Reflections with Mirrors from Buggy and Buddy

Water, Mirrors, and Reflection from My Nearest and Dearest
Exploring Shapes and Patterns in a Mirror Box from The Imagination Tree
Exploring Reflections with Mirrors from Little Bins for Little Hands
Explore Light Patterns with a Mylar Light Box from Buggy and Buddy
Find more STEM activities in our ebook! Learn more about it here , or b uy it now here !
Chelsey was previously an elementary teacher for 12 years and is now creating, playing, and learning at home with her two children. You can follow Buggy and Buddy on Twitter or Facebook by clicking on the icons below.
Similar Posts

Playdough Color Mixing Activity Inspired by Little Blue and Little Yellow

Science for Kids: Observing Plant Growth Using Bulbs
Our Favorite Art Supplies for Kids
Science for Kids: Rock Exploration Center
STEM for Kids: Egg Drop Project
Dancing Raisins Science Experiment for Kids

CONSIDER YOUR WEEKENDS PLANNED!
Get the best Metro Family events, festivals, concerts and activities for families delivered straight to your inbox.
- Our Magazines
Where OKC parents find fun & resources
- Get our newsletter
Simple Science Experiment: Refraction of Light

by Steve Davala
Ever see a rainbow and wonder where the colors are coming from? Ever look in a pool and wonder why people’s legs appear a little bigger or just off somehow? In this Simple Science Experiment you will learn about how light can refract or “bend” through different materials.
A tall cup (one you can’t see through), a penny, tape, water, wax paper, a magnifying glass or a pair of prescription glasses (with your parents’ permission!)
Experiment #1: Reappearing Penny
Specific Materials:
Cup, penny, water
Procedure part 1:
Place a penny in the middle bottom of a non-see-through cup (stick it there with a small piece tape)
Stand in a place where you can see inside the cup but can’t quite see the penny in the bottom of the cup (the top of the cup will block it)
While standing in the same place, have someone start to fill the cup up slowly with water. Observe when you can spot the penny just with the addition of water.
Explanation: Did you know you see things because light is bouncing off of them and you’re your eyes? Refraction is the bending of something as it travels through a different material. We will talk about light bending, but there are other things like sound waves and seismic waves (earthquakes) that also refract. Light will change the angle it moves as it goes through air into water, or vice versa. As you fill the water into the cup the light ray from the penny is bent until it can then reach your eye.
Experiment #2: Wax Paper Lens
Procedure part 2:
Cut a piece of wax paper out and place it over some fine print
Put a single drop of water on top of the wax paper and move the paper around on top of the print
Watch to see how the letters change as you move the water drop over them
Explanation: As in the first experiment, water refracts the light going through it. It is acting as a magnifying lens and causing the light to bend out from the letters, making them appear bigger. Experiment with different sized drops of water. Does this change the size of the letters? Did you know this is how glasses work? The lens will bend the light and make images get bigger or smaller, depending on the prescription. If you have a magnifying glass or if you ask your parents permission to borrow their glasses or even if you have your own, hold them over a piece of paper with words on it to see how you can change the size of the letters. The curve of the glass will cause the light to be bent, or refracted!
Experiment further:
Now that you have an idea of how refraction works, see if you can think of different ways to make a magnifying lens with water, or make other tricks like the penny experiment. Does sugar water or salt water change how big letters get if you look through it compared to plain water? Good luck, and keep experimenting.
Steve Davala is a high school chemistry and physics teacher who likes to write and work with Photoshop. He’s got two kids of his own and subjects them to these science activities as guinea pigs. Follow him on Twitter or email him at [email protected].
more stories

Geekapalooza: A STEAM Festival for Kids!

Kid-friendly ways to experience a solar eclipse

Simple Science: Balloon Blow-Up
Popular articles, featured events.
- 1 OKC Ballet’s The Nutcracker at Civic Center Music Hall
- 2 FREE Christmas In Edmond – Family Christmas Eve Church Service at New Covenant
- 3 FREE Candlelight Christmas Eve Service at Nichols Hills United Methodist Church
- 4 Drop-In Art at OKCMOA
- 5 Noon Years Eve at SMO
- 6 Arcadia Lake Eagle Watch
- 7 FREE New Year’s Stickball Game at the First Americans Museum
- 8 FREE Dolly Day Celebration at Downtown Library
Follow Us on Instagram!
- Find the Magazine
- Back Issues

Engage With Us
- Contests & Giveaways
- Signature Events
- Submit an Event
Things to Do
- Calendar of Events
- Seasonal Fun
- Weekend Picks
- Exploring Oklahoma
- Local Resource Guides
- Family Favorites
- Local Blogs
Copyright 2024 Metro Family Magazine. All rights reserved. | Terms of Use | Privacy Policy | Powered by WEB PUBLISHER PRO
Privacy Overview
Cool Science Experiments Headquarters
Making Science Fun, Easy to Teach and Exciting to Learn!
Science Experiments
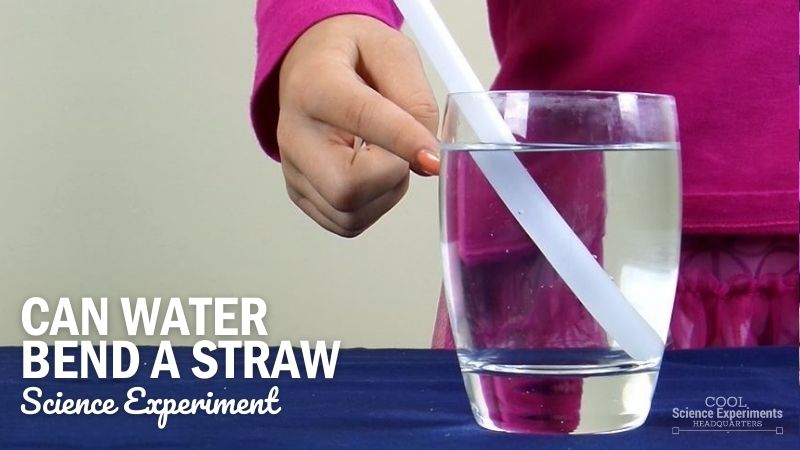
Simple Refraction of Light Science Experiment – Why Does the Straw Look Bent?
What do you think, can water bend a straw? What about other clear liquids? In this super simple science experiments, kids will learn about the refraction of light, and why a straw appears to be bent when submerged in a glass of liquid.
Find printable instructions, a video demonstration, and a helpful explanation of how this experiment works, below.
JUMP TO SECTION: Instructions | Video Tutorial | How it Works | Purchase Lab Kit
Supplies Needed
- Empty Glass
- Plastic Straw
Refraction of Light Science Lab Kit – Only $5
Use our easy Refraction of Light Science Lab Kit to grab your students’ attention without the stress of planning!
It’s everything you need to make science easy for teachers and fun for students — using inexpensive materials you probably already have in your storage closet!
Refraction of Light Science Experiment Instructions
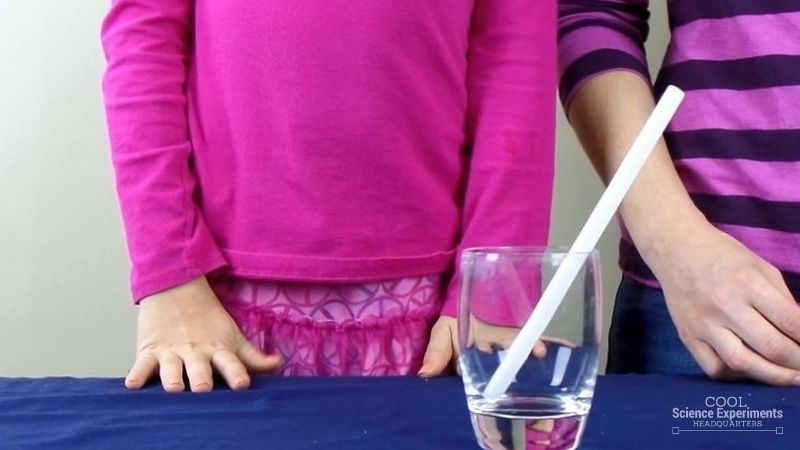
Step 1 – Start with some observations about the straw. Is there anything unusual about the straw? Make sure the kids notice that is it perfectly straight. Next, place the straw in the empty glass. Make a few more observations and point out that the straw is still straight.
Helpful tip: Use a large plastic straw from a water bottle to see the results more clearly.
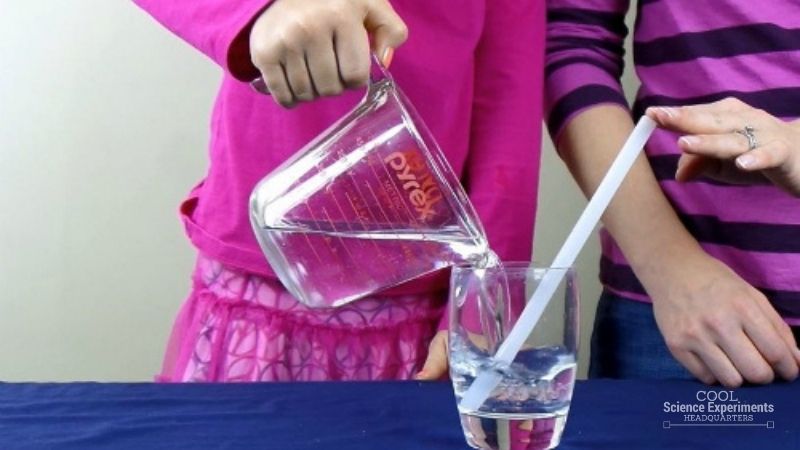
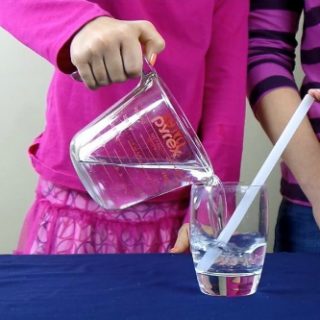
Step 2 – Next, pour water into the glass until it is nearly full. Now make a few more observations. What is different about the straw? Make sure to look directly at the side of the glass at the straw. What do you see?
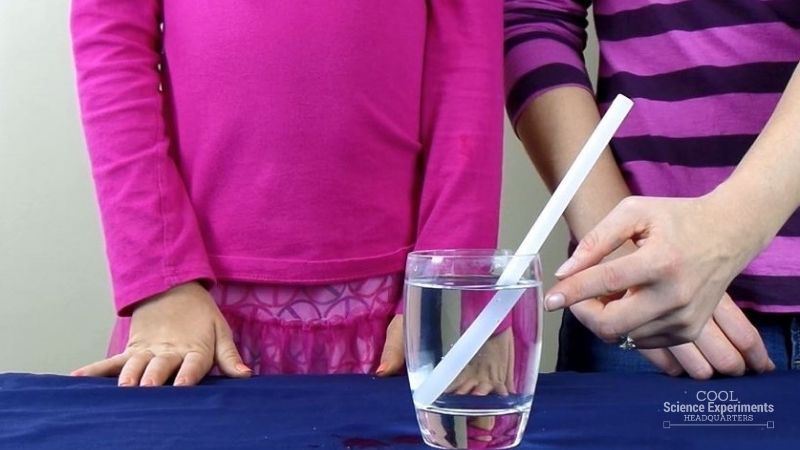
Step 3 – You will notice that near the top of the water line the straw appears to bend. Remove the straw from the water. Is it still bent? Do you know what caused the straw to appear to be bent? Find out the answer in the how does this experiment work section below.
Video Tutorial
How Does the Science Experiment Work
When you add the water to the glass, the straw appears to bend, but once you remove the straw you see it isn’t really bent at all. This is because the straw is not bending, but the light around the straw is bending due to refraction . Light refracts as it passes from one medium to the next because it travels at different speeds through those mediums. Light travels fastest through air, a little slower through water, and even slower through glass.
WHAT IS REFRACTION OF LIGHT? Refraction is the bending of light and occurs when light travels from one medium to another. For example when the light moves from air to water, or from water to air.
We need light in order to see. When we look at the straw outside of the glass of water, the light coming from the straw travels through the air straight to your eye. As you look at the straw in the glass of water, the light coming from the straw to your eye bends as it passes through three different mediums (water, glass, and air). As the light passes from one medium to the next, it changes speed and bends.
Other Ideas to Try
Try this experiment with liquids other than water. Liquids to try would be light corn syrup, rubbing alcohol, or clear Gatorade. Does the liquid you use affect how much the straw appears to bend?
More Experiments that Show The Refraction Of Light
Light Refraction Science Experiment – Watch in amazement as the arrow to changes direction.
Ruler Changes Size Science Experiment – Observe how the size of an object changed when viewed through different liquids.
I hope you enjoyed the experiment. Here are some printable instructions:
Can Water Bend a Straw Experiment
Instructions.
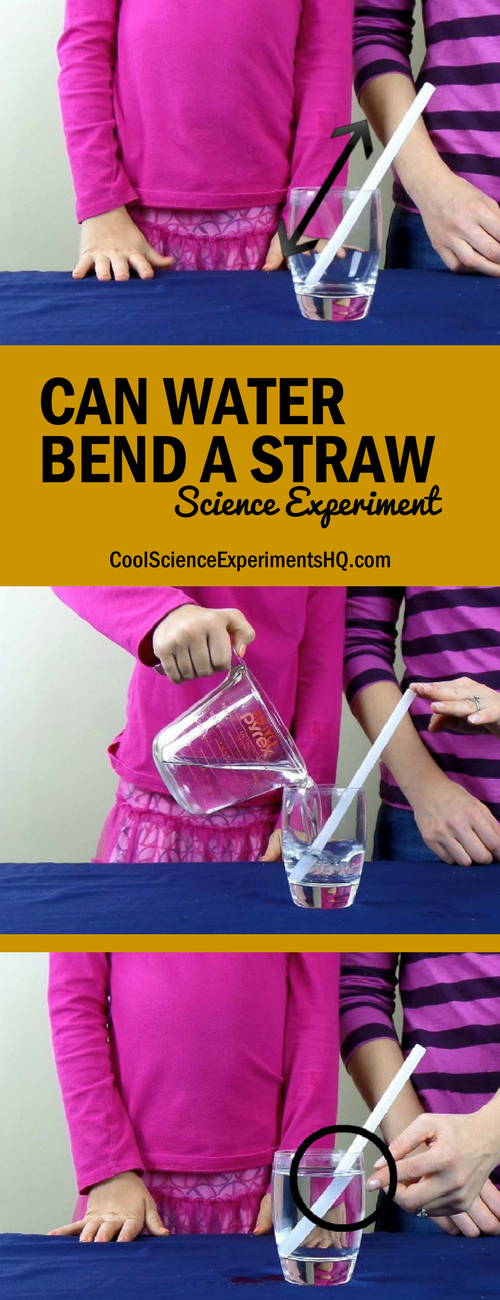
- Observe the straw and notice that it is perfectly straight. Next, place the straw in the empty glass and take note that the straw is still straight. Helpful tip: Use a large plastic straw from a water bottle to see the results more clearly.
- Pour water into the glass until it is nearly full. Look directly at the side of the glass at the straw. What do you see?
- You will notice that near the top of the water line the straw appears to bent. Remove the straw from the water. Is it still bent?
Reader Interactions
September 14, 2017 at 2:36 am
Optical illusion
Leave a Reply Cancel reply
Your email address will not be published. Required fields are marked *
Save my name, email, and website in this browser for the next time I comment.

- Privacy Policy
- Disclosure Policy
Copyright © 2024 · Cool Science Experiments HQ

Refraction of Light Experiment: Easy Science for Kids
By: Author Jacquie Fisher
Posted on Published: February 1, 2019
Categories Kids Activities & Crafts , Science Experiments
Learn about refraction of light with this easy science experiment that can be done at home or in the classroom.
Our easy science experiments are back and this week, we’re adding a touch of ‘magic’!
In my experience, you can AMAZE kids with two types of science activities — the first type are those that show some behind-the-scenes phenomenon like this How Does a Leaf Breathe? experiment!
And the second type are those that seem to work like magic.
Today we’re going to play with that sense of wonder and highlight the science behind light refraction as we bend a pencil without breaking it !
Refraction & Light Experiments: Easy Science for Kids
In the 28 Days of STEM series, this week’s topic is STEM Challenges so we thought we would introduce a science challenge that ‘tricks’ your eyes.
Similar to our Optical Illusion science experiment , light experiments also rely on what our eyes see.
This quick experiment (actually 2) is so fun to do with kids, takes only 5 minutes and is SUPER EASY — all you’ll need is a pencil and a glass of water. We’re also including affiliate links to some great books and items we used for this experiment.

Since we always pair our experiments with books (it’s a great way to explain & extend the science 😉 here are a few of our favorites on light:
Light is All Around Us – a great introduction to sunlight, shadows and the speed of light. This is from a great set of early science books which always include a ‘Learn More’ section and easy experiments kids can do after reading the book. You can see all the books in this series here: Let’s Read & Find Out Science series for kids !
Explore Light & Optics with 25 Great Projects – includes a number of other cool activities and experiments kids can do with light! I love the Explore Your World project books — so many awesome themes & topics!
The Bending Pencil Experiment: Light Refraction
Step 1: Fill a drinking glass or glass jar with water.
We used a mason jar since all of our drinking glasses have an etched design in them. You’ll get the best results with a clear, glass container for this experiment.
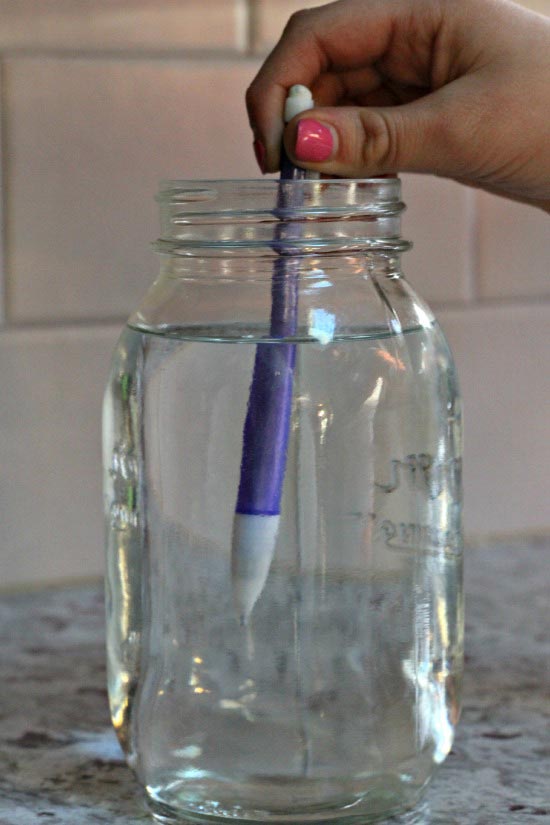
Step 2: Hold the tip of the pencil while inserting it into the water
You can already see that the pencil appears larger once in the water (as water is also a magnifier — learn more about that in this pine cone experiment ).
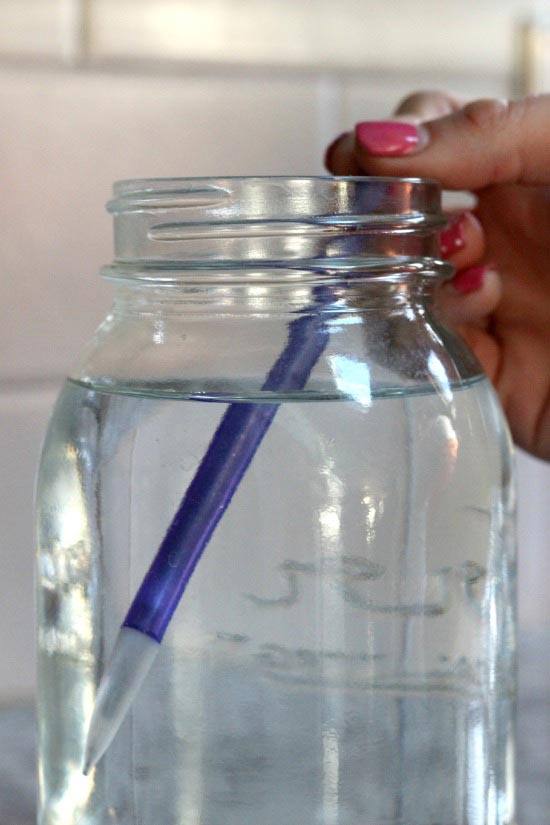
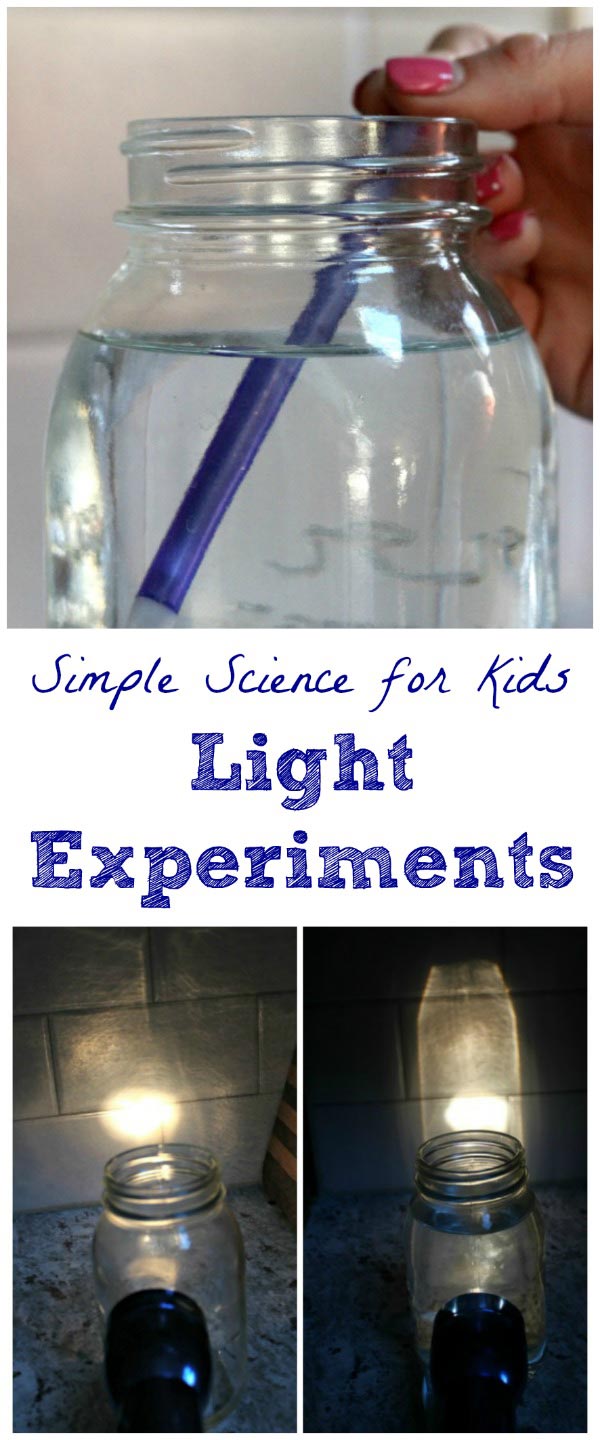
Step 3: Look at the pencil through the side of the glass or jar — did it bend?
You may have to lean the pencil closer to the front of the glass but you should see a distinct ‘break’ in the pencil when you peep through the side of the glass. As you can see above, the part of the pencil in the water appears to be shifted to the left of where you would expect to see it.
You can tell kids that this is an optical illusion — your eyes are being ‘tricked’ because the pencil still looks the same when you pull it out of the water.
Pretty darn cool, huh!?!
Here’s the science behind this cool experiment …
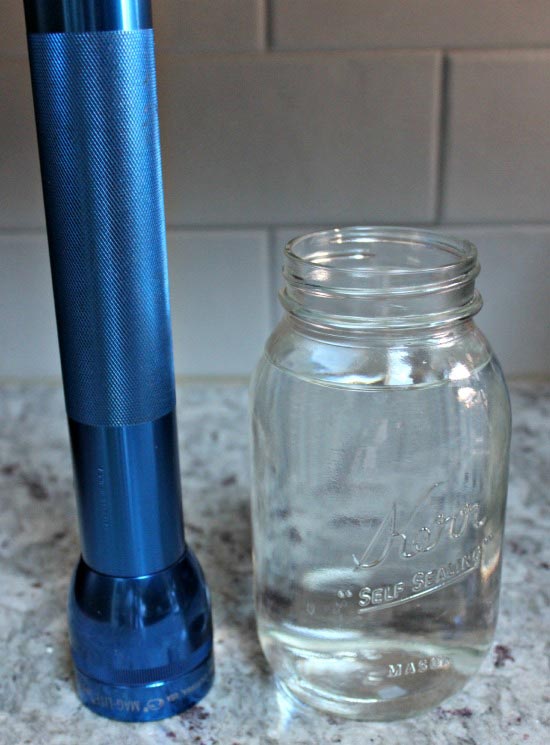
Why Does a Pencil Look Bent in Water?
Refraction is a physics concept that refers to how a wave travels through a medium.
In this case, we’re looking at how light waves travel through the air, through water and through glass.
Light waves travel faster thought air (which is a less dense material) than they do through water or glass (a more dense material). So as the light waves enter the glass and water, they slow down and bend into the water.
Since the light waves are no longer traveling at the same angle, this makes the pencil appear to ‘break’ when you look at it through the glass of water.
How Light Waves Travel through Water
We’re going to try a second cool science experiment: The Glowing Jar!
We’ll use a jar, some water and a flashlight to get an close-up look at refraction.
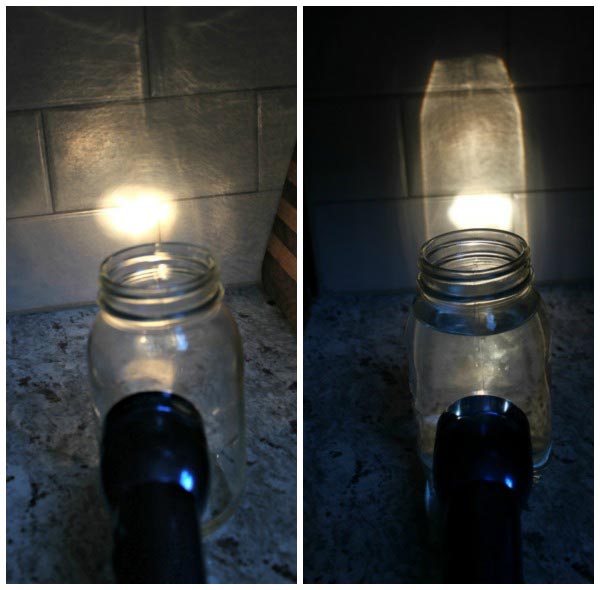
Let’s look at light waves without the pencil.
Since both the glass and the water are more dense materials than air, when you shine a flashlight into the glass (on the left), the light waves will slow down slightly as they enter and then return to normal as they exist the other side so you see one round spot of light.
However, once you add water to the glass (on the right), you can see that the light shining through the glass is more dispursed — now there is BOTH a spot of light and a ‘glowing’ outline of the jar showing on the wall due to how the light waves are refracting (or bending) as they travel through the water.
If you’ve ever been on a boat and looked over the side into the water, this explains why you can see so much below the water — sunlight is refracting (bending) to illuminate a wider area.

One way to explain this to kids is to think about running at the beach and into the water. When you run on the sand, you can move quickly because you are only running through air.
However, when you continue to run into the water, you will not be able to move as quickly because water is more dense and slows you down.
The same applies to beams of light — as they enter water, they slow down and can’t move as quickly.
If you want to see another refraction experiment, visit my friend Erica at What do We do all Day to see how they made an arrow change directions with a glass of water !

If you’d like to explore more with light science and optical illusions, a few fun items along with affiiliates links include:
More Easy Science Experiments!
The Science of Sound: Create Your own Gong
How do Leaves Breathe?
Be sure to join us for the 28 Days of Hands-on STEM Activities hosted by Left Brain, Craft Brain this month!
Every day, you can find new activities that cover science, technology, engineering and math perfect for kids from preschool thru middle school!
Look! We're Learning!
Early Learning. Happy Teaching.
Simple Science Experiments: Simple Light Refraction Experiment
December 28, 2017 by Selena Robinson 9 Comments
Sharing is caring!
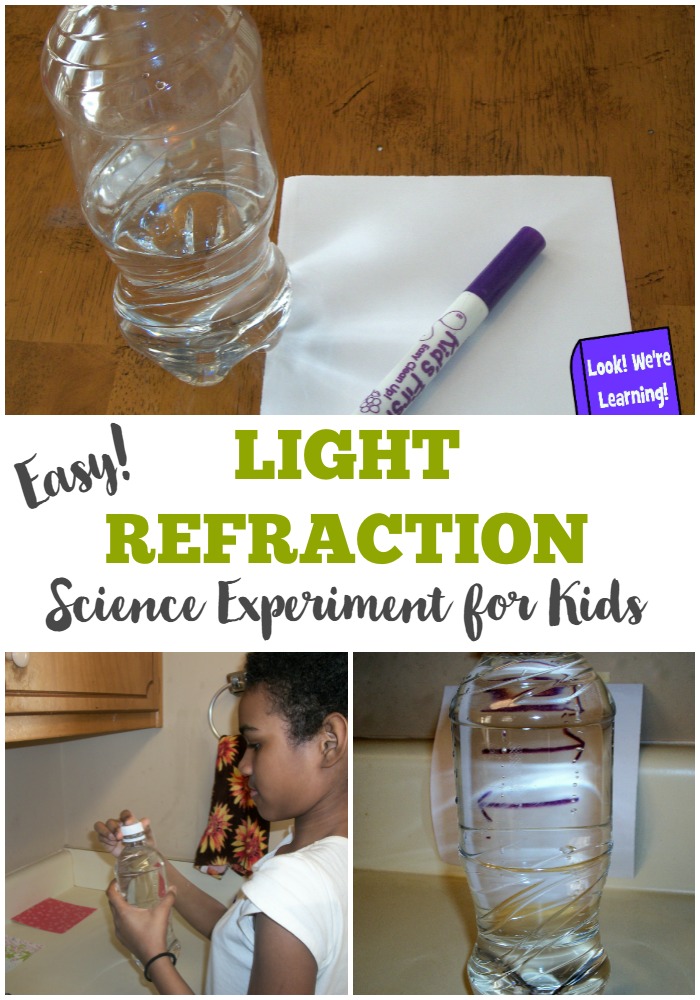
We’re continuing with our simple science experiments this week by taking a look at light refraction. I found a great light refraction experiment video on YouTube and decided to try it with Tigger.
Full disclosure: I didn’t know that refraction was what this experiment demonstrated. I actually had to look it up first. But the experiment is super easy and quick, so that’s a big plus!
Check out this easy way to teach kids about light with this simple light refraction experiment !
And, if you like this one, try some of our other science activities, including how to make an egg float and our easy heat conduction experiment !
Simple Light Refraction Experiment
Watching the original light refraction experiment on YouTube will give you a great look at what’s involved in this activity. But you really only need four things:
- A sticky note (I used a Post-It)
- An empty transparent bottle
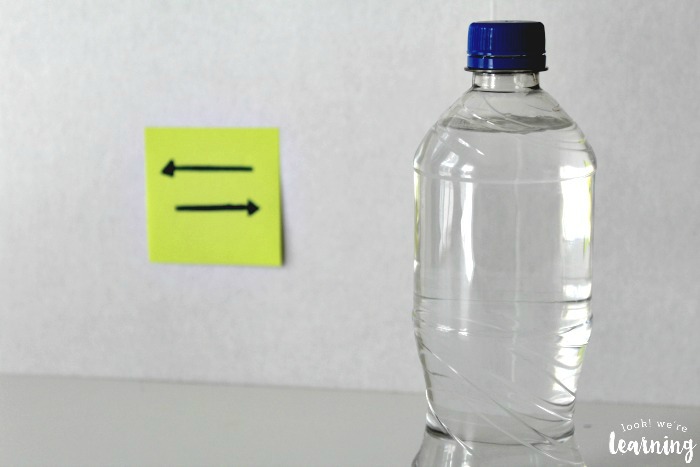
Draw two arrows on a sticky note. Make sure that each arrow points in a different direction. Stick the note to a blank wall.
Next, fill up the water bottle. Oh – put the lid on before you do this too! You don’t want water spilling out when you move the bottle around…lol.
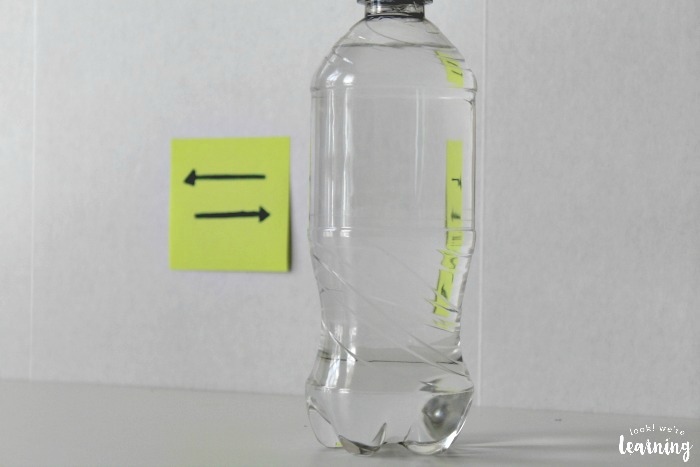
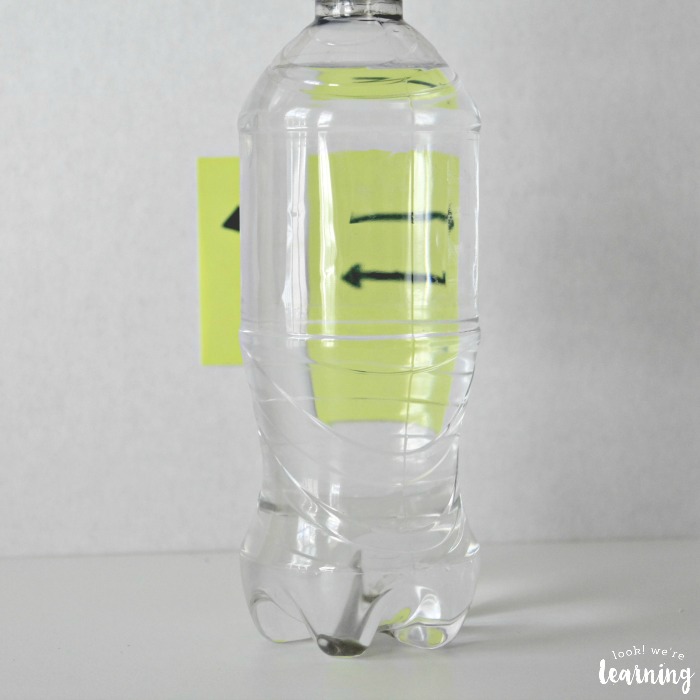
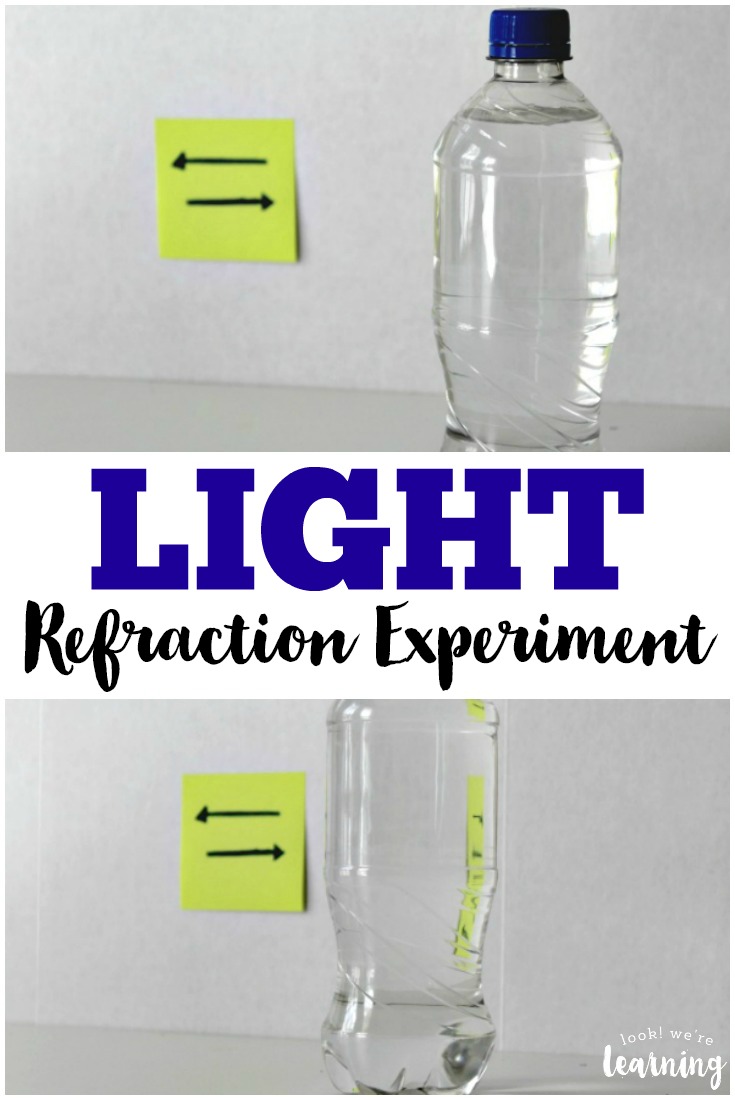
The alternating arrows on the note point to the left and the right. Let the kids gradually move the water-filled bottle in front of the sticky note. As the bottle moves in front of the sticky note, something amazing happens.
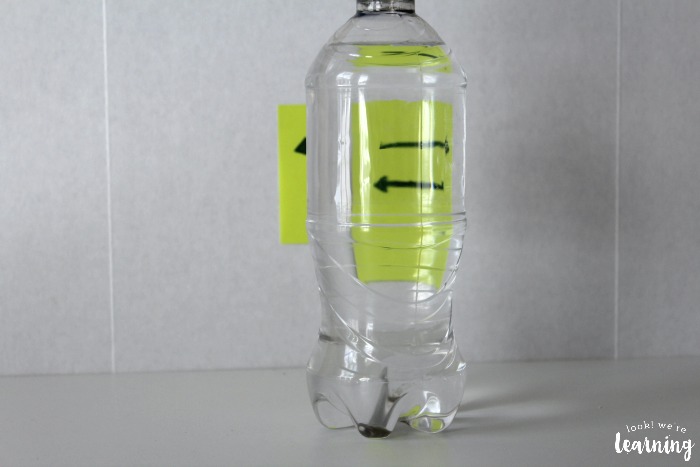
The arrows appear to change direction! The top arrow, which points to the left, appears to point to the right. And the bottom arrow, which points to the right, appears to point to the left!
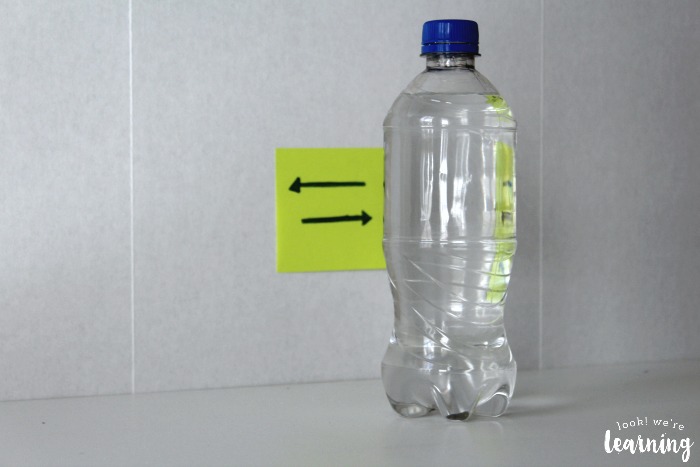
Move the bottle back to see the arrows return to their original directions.
So what exactly is going on? We learned that refraction occurs because light bends when it passes through substances, such as water and plastic.
As the light travels through a substance, it becomes concentrated into a focal point, usually near the center. After light passes through the focal point, the rays cross over each other and cause images to appear reversed.
Turns out you can’t believe your eyes after all! 🙂
Books with Simple Science Experiments:
If you liked this simple science experiment, take a look at these books with even more easy activities! (Affiliate links provided here for convenience. For details, see our Disclosure Policy .)
- Science is Simple: Over 250 Activities for Preschoolers
- 365 Simple Science Experiments with Everyday Materials
- The Everything Kids’ Science Experiments Book
- Safe and Simple Electrical Experiments
Don’t miss the rest of our Simple Science Experiments!
For more science homeschooling ideas, follow my It’s Science board on Pinterest!
P.S. Get more fun learning ideas in our email newsletter!

July 13, 2014 at 5:11 pm
I love this demonstration. Must do it again with my kids! Amazing how much you can learn and do with simple household objects!
August 3, 2014 at 1:43 am
Light refraction and how it moves is really so cool. Thanks for linking up to Science Sunday (even when I’m behind on commenting).
[…] even have a little healthy competition between groups to see who could assemble the fastest. 34. Simple Science Experiments: Simple Light Refraction Experiment 35. Ocean floor digging, search for the HL Hunley 36. Quick and easy archaeology dig to get your […]
[…] Simple Light Refraction Experiment – Look We Are Learning […]
[…] Simple Light Refraction Experiment from Look We're Learning […]
[…] Simple Refraction Science| Look We’re Learning […]
[…] can learn about light refraction with this simple experiment. It’s quick and easy to set up with your kids, and they’ll […]
[…] Light Refraction Science Experiment ~ Look We’re Learning […]
[…] Simple Light Refraction Experiment from Look, We’re Learning!: This experiment is quick and easy to set up, and it’s a simple way to teach kids about light refraction in water using a water bottle, a post-it note, and a marker. […]
Leave a Reply Cancel reply
Your email address will not be published. Required fields are marked *
Save my name, email, and website in this browser for the next time I comment.

Light Refraction – Kids Experiment

- A clear empty bottle
- Something to write on (such as card or paper)
- Something to write with (such as a pen or marker)

- Next, fill your bottle up to the top with water. If the bottle has any labels on it, take them off as you’ll need to see through the bottle for the experiment to work.

- Adjust the angle and positioning until you see an inverted image of what you wrote down on the card or paper. If you wrote down a “backwards” message beforehand, it should now appear flipped through the bottle and become readable. And that’s a simple take on the Light Refraction experiment – now let’s learn how it works!
You May Also Like

Chocolate and the Speed of Light

See Saturn (CosWatch Blog 8)

Anti-Gravity Water – Kids Experiment
Run your own fun science branch.
A Fun Science franchise is perfect if you want to run your own business without the risks and hassle of starting up alone. Interested? Then click the link for more information!

IMAGES
COMMENTS
Mar 30, 2020 · This light refraction experiment might be one of the most simple to set up science experiments we’ve ever tried. It is a bit tricky to explain, but impressive even if you can’t quite get your head around it! If you like this activity don’t forget to check out out our other easy science experiments for kids.
Today, I’m sharing a science experiment that blurs the lines between magic and the marvels of physics. You’ll turn a simple drawing into a captivating optical illusion with just a glass of water. This activity, perfect for kids and adults alike, dives into the phenomenon of light refraction.
Light Refraction Science Experiment Step by Step Instructional Video. How Does the Science Experiment Work. The scientific concept that is at work in this experiment is called refraction. Refraction is the bending of light. Refraction occurs when light travels from one medium to another (ie. air to water, water to air).
Feb 10, 2016 · Here’s a fun collection of light science for kids! You’ll find light science experiments about both light refraction and light reflection in this science roundup. Follow our Science for Kids Pinterest board! Because we have been having so much fun with our most recent light science activities, I decided to round up some more...
In this Simple Science Experiment you will learn about how light can refract or “bend” through different materials. Materials: A tall cup (one you can’t see through), a penny, tape, water, wax paper, a magnifying glass or a pair of prescription glasses (with your parents’ permission!) Experiment #1: Reappearing Penny. Specific Materials:
Refraction of Light Science Experiment Step by Step Instructions. How Does the Science Experiment Work. When you add the water to the glass, the straw appears to bend, but once you remove the straw you see it isn’t really bent at all. This is because the straw is not bending, but the light around the straw is bending due to refraction. Light ...
Jul 6, 2023 · For an easy and engaging science experiment, try this refraction of light experiment! Kids will be amazed to watch the arrows magically switch directions as they perform this fun science trick. RELATED: Grow a Rainbow Experiment
Feb 1, 2019 · Refraction & Light Experiments: Easy Science for Kids. In the 28 Days of STEM series, this week’s topic is STEM Challenges so we thought we would introduce a science challenge that ‘tricks’ your eyes. Similar to our Optical Illusion science experiment, light experiments also rely on what our eyes see.
Dec 28, 2017 · Books with Simple Science Experiments: If you liked this simple science experiment, take a look at these books with even more easy activities! (Affiliate links provided here for convenience. For details, see our Disclosure Policy.) Science is Simple: Over 250 Activities for Preschoolers; 365 Simple Science Experiments with Everyday Materials
Sep 21, 2021 · There’s a lot of different “illusions” that can be caused by light manipulation and today we’re going to explore a simple example of this. This is the Light Refraction experiment, a very easy to do activity that can be done at home with kids! In order to perform this experiment, you’ll need a few easy to obtain items: You will need: Water