- Center for Innovative Teaching and Learning

Using VoiceThread to Record Narration Over Slides
This guide summarizes a solution for instructors who need a tool to allow them to record narration over a PowerPoint presentation. This approach is ideal if you were planning to present slides in your face-to-face course.
To use VoiceThread, you need access to Blackboard, and a microphone of some kind (e.g. integrated into your computer or a headset) or a telephone. If you want to capture webcam video as part of your recording, you will of course need a webcam.
Here are the steps to create a recording with VoiceThread
These instructions are slightly different for Blackboard Original courses and Blackboard Ultra courses.
Blackboard Original Courses
- Login to Blackboard and access a specific course
- Click on a content area in your course menu, such as Content
- From the Build Menu , choose Build Content , then VoiceThread
- Provide a Title and Description (as needed) and click Submit
- You should now see the VoiceThread link
- Click the link you just created
- Choose Individual VT from the configuration menu
- Click the grey Create new VoiceThread on the top left of the screen
- From your computer, drag your PowerPoint presentation to the Add Media area (or click the plus sign, then My Computer to browse for your presentation)
- Enter a Title and Description for your VoiceThread video
- Wait while the presentation processes, this could take between 1 and 5 minutes depending on the size of the presentation
- Once the presentation is processed you will see that each slide is displayed separately. Click the Comment button at the top of the window to open the presentation.
- For any slide that you want to add audio, click the comment bubble at the center of the timeline and choose the microphone icon to begin recording (or use the telephone icon to record via your telephone if you do not have a microphone)
- When you finish your audio for that slide, you can either click the next slide arrow and keep recording or click the Stop Recording link
- Once you are finished recording audio, click Stop Recording , then Save
- Click the grey X at the top right to return to the share window
- Click the blue Share with class button then the next Share with class button.
The video will begin processing, and captions will be added automatically when they are ready.
You can click the Return to Course link and close the tab to return to your course Depending on the length of the video, you can return to the course and click the link to preview the video. This is the same view students will experience.
Blackboard Ultra Courses
- Click the plus icon to add content and choose Content Market
- Click the plus icon in the lower right corner of the VoiceThread tile
You can click the Return to Course link and close the tab to return to your course
Depending on the length of the video, you can return to the course and click the link to preview the video. This is the same view students will experience.
Phone: 815-753-0595 Email: [email protected]
Creating a new VoiceThread
To create a new VoiceThread, click on the + icon (label: “Create a new VoiceThread”) at the top of the page.

Once you’ve clicked on the + button, you can start adding slides. Details about the various ways to add slides can be found in the “Create” category of this page .
Video walkthrough of how to create a VoiceThread:

How to Use VoiceThread with PowerPoint: Expert Tips
Trish Dixon
VoiceThread is a versatile tool that allows users to create engaging presentations by incorporating multimedia elements like voice, text, and video comments. PowerPoint is one of the most popular tools for creating presentations, and when combined with VoiceThread, it can elevate your content to the next level.
In this article, we will guide you step-by-step on how to use VoiceThread with PowerPoint, helping you make the most out of these two powerful tools.
Why Use VoiceThread with PowerPoint?
Before diving into the steps, let’s understand why combining VoiceThread with PowerPoint is a great idea:
- Enhanced Engagement : VoiceThread allows you to add voice, text, and video comments to your PowerPoint slides, making them more interactive.
- Collaborative Learning : Users can comment on each slide, enabling collaborative discussions and feedback.
- Accessibility : VoiceThread supports multiple formats, ensuring your presentation is accessible to a broader audience.
- Easy Sharing : You can easily share your VoiceThread presentations with others, making it perfect for remote learning and presentations.
Preparing Your PowerPoint Presentation
The first step in using VoiceThread with PowerPoint is to prepare your PowerPoint slides. Here’s how you can get started:
1. Create Your PowerPoint Slides
Begin by creating your PowerPoint presentation as you normally would. Here are a few tips to keep in mind:
- Keep It Simple : Avoid cluttering your slides with too much text. Use bullet points, images, and charts to convey your message.
- Use High-Quality Images : Ensure that any images you include are of high quality and relevant to the content.
- Include Speaker Notes : If you plan to add voice comments, it can be helpful to include notes that you can reference when recording your comments.
2. Save Your PowerPoint Presentation
Once your PowerPoint slides are ready, you need to save them in a format that VoiceThread supports:
- Save as PDF : VoiceThread works best with PDFs. To save your PowerPoint as a PDF, click on File > Save As . In the “Save as type” dropdown, select PDF and save your file.
- Individual Images : Alternatively, you can save each slide as an image if you want more control over the upload process. To do this, go to File > Save As and select JPEG or PNG as the file type.
Uploading PowerPoint Slides to VoiceThread
Now that your PowerPoint slides are saved as a PDF or images, the next step is to upload them to VoiceThread. Here’s how:
1. Log in to VoiceThread
Go to the VoiceThread website and log in with your credentials. If you don’t have an account, you can sign up for free.
2. Create a New VoiceThread
Once logged in, click on the Create button. This will start the process of creating a new VoiceThread presentation.
3. Upload Your Slides
- Click on the Add Media button and select My Computer .
- Upload your saved PDF or image files. VoiceThread will automatically create a slide for each page or image.
4. Arrange Your Slides
After uploading, you can rearrange the slides by dragging them into the desired order. This step is crucial if you uploaded the slides as individual images.
Adding Voice and Text Comments
With your slides uploaded, the next step is to add comments to enhance your presentation. VoiceThread allows you to add voice, video, and text comments to each slide.
1. Add Voice Comments
- Select the slide you want to comment on and click on the Comment button.
- Choose the Microphone option to record your voice. You can also select the Webcam option to record a video comment.
- After recording, you can listen to your comment and re-record it if necessary. Once satisfied, save the comment.
2. Add Text Comments
- To add a text comment, select the slide and click on the Comment button.
- Choose the Text option and type your comment. You can format your text using the available options.
3. Adding Multiple Comments
You can add multiple comments to a single slide. For example, you can start with a voice comment and then add a text comment for additional information.
Organizing and Customizing Your VoiceThread Presentation
Once you’ve added your comments, you can further organize and customize your VoiceThread presentation to make it more engaging.
1. Reorder Comments
If you have multiple comments on a slide, you can reorder them by dragging and dropping the comments in the desired sequence.
2. Add Titles and Descriptions
You can add a title and description to each slide to provide context. This is particularly useful if you’re sharing the presentation with others who may not be familiar with the content.
3. Customize Slide Settings
VoiceThread allows you to customize settings for each slide, such as enabling or disabling commenting and controlling the slide duration. To access these settings, click on the gear icon on each slide.
4. Use Drawing Tools
VoiceThread provides drawing tools that allow you to highlight specific areas of your slide during your voice or video comments. This is especially useful for emphasizing key points.
Sharing Your VoiceThread Presentation
Once your VoiceThread presentation is ready, you can share it with others. VoiceThread offers multiple sharing options:
1. Share with Specific People
You can share your presentation with specific individuals by entering their email addresses. They will receive a link to view the presentation.
2. Share with a Group
If you’re part of a group on VoiceThread, you can share the presentation with the entire group.
3. Embed in a Website
VoiceThread provides an embed code that allows you to embed the presentation on a website or blog. This is a great option for educators and content creators who want to share their presentations publicly.
4. Generate a Link
You can generate a shareable link to your VoiceThread presentation. You can set privacy options to control who can view and comment on the presentation.
Best Practices for Using VoiceThread with PowerPoint
To make the most out of VoiceThread with PowerPoint, consider the following best practices:

1. Plan Your Comments
Before recording comments, plan what you want to say. This will help you create clear and concise messages.
2. Test Your Audio
Ensure that your microphone is working properly and that the audio quality is clear. Poor audio can detract from the quality of your presentation.
3. Engage Your Audience
Use questions, prompts, and interactive elements to engage your audience. Encourage them to leave comments and participate in discussions.
4. Keep It Concise
Avoid long-winded comments. Keep your voice and text comments short and to the point. This will help maintain your audience’s attention.
Troubleshooting Common Issues
While using VoiceThread with PowerPoint is generally straightforward, you may encounter some common issues. Here’s how to troubleshoot them:
1. Slides Not Displaying Correctly
If your slides are not displaying correctly, ensure that you’ve saved your PowerPoint as a PDF or high-quality images. Re-upload the slides if necessary.
2. Audio Not Working
If your audio isn’t working, check your microphone settings. Make sure your microphone is properly connected and that VoiceThread has permission to access it.
3. Comments Not Saving
If your comments aren’t saving, check your internet connection. A stable connection is necessary for VoiceThread to save your work.
Comparing VoiceThread with Other Presentation Tools
While VoiceThread is a powerful tool, it’s important to understand how it compares with other presentation tools. Here’s a quick comparison:
Final Thoughts
Using VoiceThread with PowerPoint is an excellent way to enhance your presentations by adding interactive elements such as voice, video, and text comments. Whether you’re an educator, student, or professional, this combination can help you create more engaging and collaborative presentations.
How do I upload a PowerPoint presentation to VoiceThread?
To upload a PowerPoint presentation to VoiceThread, save your PowerPoint slides as a PDF or individual image files. Then, log in to VoiceThread, create a new VoiceThread, and use the “Add Media” button to upload your PDF or image files. Each page or image will be converted into a slide in VoiceThread.
Can I add voice comments to my PowerPoint slides in VoiceThread?
Yes, you can add voice comments to your PowerPoint slides in VoiceThread. After uploading your slides, select a slide, click on the “Comment” button, and choose the “Microphone” option to record your voice comment.
Can I share my VoiceThread presentation with others?
Yes, you can share your VoiceThread presentation with others. VoiceThread offers options to share your presentation via email, with a group, or by generating a shareable link. You can also embed your VoiceThread presentation on a website or blog.
What should I do if my audio is not working in VoiceThread?
If your audio is not working in VoiceThread, first check your microphone settings to ensure it is properly connected and that VoiceThread has permission to access it. If the issue persists, try using a different browser or device.
How can I add text comments to my VoiceThread presentation?
To add text comments to your VoiceThread presentation, select the slide you want to comment on, click on the “Comment” button, and choose the “Text” option. You can then type and format your text comment before saving it.
What are the best practices for using VoiceThread with PowerPoint?
Best practices for using VoiceThread with PowerPoint include planning your comments in advance, ensuring high audio quality, engaging your audience with interactive elements, and keeping your comments concise. Additionally, test your setup before finalizing the presentation to avoid technical issues.
- Recent Posts
- How To View Two Slides Side by Side in PowerPoint? – December 17, 2024
- How to Apply Gradient to Shapes in PowerPoint: Expert Tips! – December 12, 2024
- How to Group Shapes in PowerPoint: A Step-by-Step Guide – December 9, 2024
Leave a Reply Cancel reply
Your email address will not be published. Required fields are marked *
Save my name, email, and website in this browser for the next time I comment.
Latest Posts
How to view two slides side by side in powerpoint.
Learn how to view two slides side by side in PowerPoint using simple methods like Arrange All, split-screen, and dual monitors for easy comparison.
How to Apply Gradient to Shapes in PowerPoint: Expert Tips!
Learn how to apply gradient to shapes in PowerPoint with our easy step-by-step guide. Enhance your presentations using gradients for a professional look.
How to Group Shapes in PowerPoint: A Step-by-Step Guide
Learn how to group shapes in PowerPoint for easy editing, faster formatting, and consistent designs. Step-by-step tips to streamline your presentations.
What is VoiceThread for Education? What's New?
VoiceThread lets teachers make presentations interactive for greater student involvement
Recent updates
This article was updated in September 2024.
VoiceThread is a very smart tool for creating presentations as a group. This collaboration is at the heart of this platform, which means communication across devices is well-enabled.
So that can mean creating a presentation, using images, videos, audio, drawings, and more. It also allows others to add their offerings, as well as comment throughout. It's this interactive commenting that makes this a great teaching tool.
It can also be a really helpful platform for students to work with together to create projects, while in the room together as well as between or after classes. Everything has been built and updated to offer maximum simplicity and intuitive use so it can work for a wide range of student ages and abilities.
Read on to find out everything you need to know about VoiceThread for education.
- VoiceThread Lesson Plan
- New Teacher Starter Kit
- Best Tools for Teachers
What is VoiceThread?
VoiceThread is a tool for presenting via a number of platforms, including the web, iOS, Android, and Chrome. This lets teachers and students create slides-based presentations that can feature lots of rich media and be interacted with using a wide selection too.
For example, this could mean a slideshow with images and videos about a subject or project, set by the teachers. When sent out, using a simple link, this can then be made available for students for feedback and collaboration. It can provide a great way to learn and develop a point of knowledge, all done in class or remotely at the students' pace.
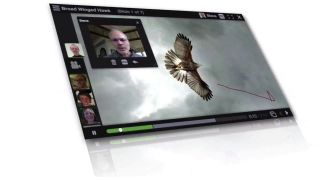
VoiceThread, as the name suggests, lets you voice record notes on slides so that it can be used as a way to offer students feedback on their projects or as a personal way to guide them through your presentation.
Tech & Learning Newsletter
Tools and ideas to transform education. Sign up below.
This is a useful teaching tool as when a project is complete, there are options to set privacy, sharing, comment moderation, embedding, and plenty more so it can be perfected for the school environment.
What's new in VoiceThread?
VoiceThread has rolled out some decent upgrades recently, including a single interface accessible to everyone, including those reading the screen. The media player has had a redesign along with the homepage so as to offer greater integration across the mobile app and media player. Everything is now more streamlined and supports new features better.
The conversation structure has been simplified to make communications easier. Also there is an ability now to open the slide gallery while still commenting. On that subject, users can now add interactive video comments and there's an ability to set a maximum limit on comment length.
How does VoiceThread work?
VoiceThread offers a useful control platform for teachers. Using the administrative account, it is possible to adjust the security settings so that student work can remain private. That said, it is still difficult to restrict student access to the wider Ed.VoiceThread and VoiceThread communities.
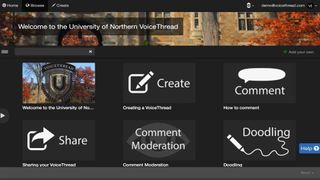
VoiceThread is easy to use. Go to the top of the page and select Create. You can then select the plus Add Media option and pick from your device, or simply drag and drop files from your machine onto this page to upload into the project. You can then edit or delete via the thumbnail icons at the bottom, or drag and drop to re-order.
Then you can select the Comment option to begin adding your touches to each slide. This ranges from text to voice to video and more from online. This is done using a clear and simple icon interface at the bottom of the screen.
For voice comments, for example, select the microphone icon and start talking – you can then click and highlight and draw on the screen to show what you're talking about. Use the bottom right arrow to go between slides, during your comment. When done, hit the red stop record icon then save once you're happy.
Next you can select Share to allow you to share with lots of options to suit all different platforms.
This sample VoiceThread lesson plan is designed to help implement it into instruction.
What are the best VoiceThread features?
VoiceThread is simple to use, despite giving a huge range of ways to communicate. Live linking is a helpful feature that allows you to place an active link in the comment on a slide so students can check into more depth using that option before coming back to the slide.
Hiding the comments using moderation is also a great feature. Since it allows only the VoiceThread creator to see comments, it forces students to be original in what they're saying. It also discourages reactive comments.
VoiceThread is a signatory of the Student Privacy Pledge .
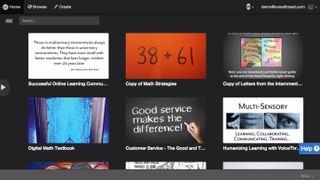
Tags are a great part of VoiceThread as it allows you to carry out a search based on keywords. You can then organize your VoiceThreads for quick access. For example, you could tag by subject, student, or term, and then quickly get to those specific presentations using the MyVoice tab.
To tag, look for the tag field in the Describe Your VoiceThread dialog box under the title and description fields. A good tip is to keep tags to a minimum so you don't end up searching through tags to then search through the content itself.
How much does VoiceThread cost?
VoiceThread allows students to participate in a conversation for free by simply creating an account. But to create projects you are required to have a paid subscription account.
A single educator license for K-12 is charged at $79 per year or $15 per month . This includes an Ed.VoiceThread membership, 50 student accounts, a virtual class organization to hold the accounts, a manager to create and manage student accounts, and 100 export credits per year.
Go for a school or district-wide license and that is charged at a tailored rate for which you need to contact the company.
VoiceThread best tips and tricks
Use voices Set responses to voice only so students engage orally with a point rather than simply opting to type a short response.
Icebreak Use easy opinion points to start so students get comfortable with the response system and being interactive, before moving on to more challenging response requirements.
Go mobile Encourage students to use the app on their devices so they can interact outside of class, or directly from their space, with the ease of using their own devices.
Luke Edwards is a freelance writer and editor with more than two decades of experience covering tech, science, and health. He writes for many publications covering health tech, software and apps, digital teaching tools, VPNs, TV, audio, smart home, antivirus, broadband, smartphones, cars and much more.
KnoPro: How to Use It to Support CTE
What to Know About Buying Robots for Schools
9 Suggestions For Your AI Reading List
Most Popular
- 2 Tech & Learning Joins USA EdTech as Bett Media Partner
- 3 KnoPro: How to Use It to Support CTE
- 4 What to Know About Buying Robots for Schools
- 5 AI’s Remarkably Imperfect Productivity Tricks Us Into Mistakes. Here’s How You Can Avoid These

IMAGES
COMMENTS
Each VoiceThread activity is worth a total of 10 points with a possibility of earning a maximum of 11 points. The following rubric will be used to assess your contributions in each VoiceThread activity. If you have a question about one of your scores, please reference this rubric.
Each VoiceThread activity is worth a total of 10 points with a possibility of earning a maximum of 11 points. The following rubric will be used to assess your contributions in each VoiceThread activity. If you have a question about one of your scores, please reference this rubric.
VoiceThread Universal lets you browse threads and hear comments in pages specially designed for screen readers. ... student presentations conversational practice
Learn how to use VoiceThread for instructor-created mini-lectures and student-created presentations. VoiceThread allows two-way conversations, asynchronous delivery, and easy assessment in your online or blended courses.
Create the VoiceThread presentation: Click the link you just created; Choose Individual VT from the configuration menu; Click the grey Create new VoiceThread on the top left of the screen; From your computer, drag your PowerPoint presentation to the Add Media area (or click the plus sign, then My Computer to browse for your presentation)
To create a new VoiceThread, click on the + icon (label: “Create a new VoiceThread”) at the top of the page. Once you’ve clicked on the + button, you can start adding slides. Details about the various ways to add slides can be found in the “Create” category of this page. Video walkthrough of how to create a VoiceThread:
Aug 8, 2024 · VoiceThread is a versatile tool that allows users to create engaging presentations by incorporating multimedia elements like voice, text, and video comments. PowerPoint is one of the most popular tools for creating presentations, and when combined with VoiceThread, it can elevate your content to the next level.
Once you have selected your PowerPoint PDF, VoiceThread is going to ask you to give it a Title. You can also add a description if you wish. When you finished, click Save. Your PDF PowerPoint presentation will start to upload to your VoiceThread.
Reordering VoiceThread Slides 1. Click on the VoiceThread you wish to edit from the My Voice tab to open it. 2. From the Menu gear at the top left select Edit. 3. Click and drag slides to a new position to reorder them. Deleting VoiceThread Comments 1. To delete a comment, open the VoiceThread presentation from the My Voice tab. 2.
1. To access existing VoiceThread presentations, click the Home icon on the upper left of the screen. You can then select any VoiceThread presentation from the thumbnail list. 2. By clicking on the three horizontal bars [1]. You can organize your existing VoiceThread presentation (thumbnail) list by All, Owned by me, Shared with me, Title ...
Nov 6, 2014 · VoiceThread is a multimedia, collaborative tool that allows instructors to upload different types of media–images, documents, videos, slides– into a presentation (called a VoiceThread itself). The instructor and students can then comment on each individual “slide” using text, audio, or video comments.
Sep 5, 2024 · VoiceThread is a very smart tool for creating presentations as a group. This collaboration is at the heart of this platform, which means communication across devices is well-enabled. So that can mean creating a presentation, using images, videos, audio, drawings, and more.