

Enkla barns vetenskapsmässiga experiment om bakterier
Glitter germs, där bakterierna är, vanlig, antibakteriell eller sanitizer, odla några bakterier.
En vetenskapsmässa ger barn chansen att testa sina vetenskapliga färdigheter och kunskaper och visa dem fram för andra. Bakterier är ett ämne med många möjligheter, från hur bakterier sprids till de potentiella farorna med vissa bakterier. Hjälp ditt barn att välja ett ämne och experiment som kan replikeras på vetenskapsmässan så att hennes publik får en väl avrundad utbildning om vetenskapen om bakterier.
Att illustrera hur snabbt bakterier sprids är en användbar och underhållande vetenskapsmässig aktivitet som kan göras med publikens medlemmar. Ge varje person en liten spruta med handrensningsmedel eller en spritz vatten från en sprayflaska. Deltagarna rullar omedelbart sina fuktiga händer i glitterfack på demonstrationsbordet. Glitteret kommer att fungera som groddar i experimentet. Be deltagarna att skaka hand med människor som inte har glitter på sina händer och att röra saker runt området, till exempel kanten på bordet eller ett handväskhandtag. Låt publiken se hur lätt glitteret överfördes från händerna till andra ytor och påminn dem om att tvätta händerna kommer att hjälpa till att stoppa denna överföring. Byt ut glitteret med mjöl eller majsstärkelse för ett annat alternativ.
Med viss förberedelse kan ett vetenskapsmässigt projekt visa vilka ytor som har flest bakterier. Ett barn måste samla fyra potatisskivor och gnida potatisens köttdel på olika ytor, till exempel en dörrknopp eller toalettstol, utan att vidröra köttdelen. Återigen, utan att röra vid den köttdel som har gnugts på ytan, bör varje potatisskiva placeras i enskilda zip-top-påsar, märkta med rätt yta. Placera påsarna i en mörk garderob under en vecka och observera sedan vilka som växer saker, vilket indikerar förekomsten av bakterier. Under vetenskapsmässan kan eleven visa potatisskivorna och beskriva experimentets process. Som ett alternativt experiment kan ett barn gnida potatisskivorna längs tungan före och efter att ha borstat tänderna för att visa vikten av god munhygien.
Ett experiment som illustrerar effektiviteten hos vanlig tvål, antibakteriell tvål och handrensning är ytterligare ett bra vetenskapsmässigt projekt. För att genomföra experimentet tvättar studenten händerna med vanlig tvål och gnider dem sedan i en petriskål. Senare, efter att ha använt händerna ett tag, tvättar studenten dem med antibakteriell tvål och gnider dem i en petriskål. Efter att han har använt händerna flera gånger kommer han att tvätta dem med handrensningsmedel och gnida dem i en petriskål. Studenten lämnar sedan petriskålen i en vecka eller två och ser vilken som odlar den mest synliga mögel eller bakterier. Detta visar om en produkt är överlägsen eller underlägsen än en annan. Istället för petriskålar kan eleven gnida händerna på brödskivor och skjuta dem i plastpåsar för att få liknande resultat.
För detta experiment kommer studenten att använda bomullstussar för att gnida olika ytor för att avgöra om handrensningsmedel är effektivt för att döda bakterier. När vattpinnarna har gnidts på ytor, som cafeteriagolvet, studentens skrivbord och en mobiltelefon, gnuggas de i petriskålar som innehåller agar, som enligt den välkända forskaren Steve Spangler är mat för potentiella bakterier. Dessa petriskålar finns i många butiker för lärarleveranser. Studenten behöver faktiskt två petriskålar för varje vattpinne. Den ena är kontrollen och den andra gnuggas med handrensningsmedel omedelbart innan du gnuggar in bomullspinnen inuti. En vattpinne från en mobiltelefon gnides i kontrollpetriskålen, och samma vattpinne gnuggas också i en med handrensningsmedel. Petriskålarna lämnas på en varm, mörk plats att växa under flera dagar så att studenten kan jämföra tillväxten i kontrollrätterna med mängden tillväxt i diskarna med handrensningsmedel.
Enkla vetenskapsmässiga projektidéer för en sjätte klass

Vetenskapsprojekt ger eleverna möjlighet att lära sig utanför klassrummet. Sjätte klassare får möjlighet att välja projekt på egen hand, tillsammans med deras föräldrar, och lära sig om vetenskap på utraditionella sätt. Studenterna bör ges olika idéer för potentiella vetenskapsprojekt för att ...
Enkla och enkla vetenskapsmässiga projekt

Science fair-projekt är en stor del av dagens utbildning som gör det möjligt för elever att experimentera och utforska ämnen av intresse. Många elever har inte tid eller förmågor att kräva för att producera komplicerade projekt, som ofta är dyra och tidskrävande. Men det finns en mängd olika enkla och enkla ...
Barns experiment med elektriska kretsar

Att lära sig om el genom att bygga elektriska kretsar är det bästa sättet att visa barnen hur el fungerar. Studenter måste förstå att elektroner hoppar genom luften till en positivt laddad atom och måste vänta tills det finns en bro mellan de negativa och positiva områdena för att slutföra cykeln. Den här bron ...

Redaktörens val

Ljus är en typ av elektromagnetisk strålning som är synlig för det mänskliga ögat. Det är tillverkat av små paket som kallas fotoner. Fotoner beter sig som partiklar på vissa sätt och som vågor på andra sätt. Om du exempelvis lyser en ljusstråle mot en spegel, så slår den av sig precis som en boll skulle göra. Om du lyser igenom ...

Frågan om hur ljus reser genom rymden är ett av fysikens fleråriga mysterier. I moderna förklaringar är det ett vågfenomen som inte behöver ett medium för att sprida sig. Enligt kvantteorin fungerar den också som en samling av partiklar under vissa omständigheter. För de flesta ...

Elektromagnetiska vågor För att förstå hur ljus rör sig från solen till jorden måste du förstå vad ljus är. Ljus är en elektromagnetisk våg - en våg av elektrisk och magnetisk energi som svänger mycket snabbt. Det finns många olika elektromagnetiska vågor, och typen bestäms av hastigheten på ...

Dina ögon fungerar på liknande sätt som en kamera. Ljus från hela världen passerar genom linsen och spelas in på näthinnorna på baksidan av ögonen. Informationen från näthinnorna skickas sedan till din hjärna, som omvandlar den till en medvetenhet om föremål runt omkring dig.

Ljusvågor, som har visat sig uppvisa egenskaper hos partiklar, uppför sig på vissa sätt som vi kan observera genom experiment. Ljusvågor avviker på samma sätt som vågorna avviker när de kolliderar med ett föremål. De genomgår också störningar när de passerar genom eller reflekterar mot föremål av ...

Tja, det går min NCAA-turneringsfäste 2019. Sweet Sixteen och Elite Eight-spelen gjorde som Stannis Baratheon och brände det levande. Det var kul medan det varade.

A Shocking Bacteria Science Experiment: Grow a Germ Farm
This post may contain affiliate links.
Sharing is caring!
I used to think that my house was clean . It certainly appears clean and tidy. There are no piles of trash or sticky countertops. Who knew there was so much bacteria lurking? I’m so glad we did this bacteria science experiment!
We recently studied bacteria in our science program , N OEO Biology 2 , by reading a bit of The Complete Book of the Microscope . I love the Usborne science books because they include suggested experiments. The book suggested taking a bacteria culture from hands, but we decided to take this bacteria science experiment a little further and culture other surfaces around our home as well to create our own little germ farm.
The results were quite shocking.
Bacteria Science Experiment
How to grow your own germ farm.
Growing bacteria cultures requires a few things:
- Agar plates
- Sterile cotton swabs
- Bottled water
- A heat source

- BIOTECH QUALITY, FRESH AND READY-TO-USE: Factory-direct fresh 10 100-mm Pre-poured sterile LB-agar plates and 10 sterile 6-inch long swabs (in 5 pouches)….
- The Safest Agar Plates On Amazon: Luria Broth(LB) agar plates are used to detect environmental microorganisms all over the world. They are the safest agar…
- Free Science Fair Project E-Book: Packed with easy-to-do science fair experiments with clear step-by-step instructions to help you win a science fair…
Last update on 2024-12-23 / Affiliate links / Images from Amazon Product Advertising API
- Label the cover of the agar plates with the surface you intend to swab.
- Unwrap a sterile cotton swab and pour on a little bottled water.
- Swab the surface you want to test.
- Rub the cotton swab on the agar plate.
- Place the labeled lid on top and tape it shut.
- Turn the sealed agar plate upside down so that the name is on the bottom. This lets you observe the bacteria’s growth without the label being in the way.
- Repeat as many times as you would like, using a new agar plate and a clean cotton swab with each surface.
- Place the bacteria cultures in a warm place. Ideally, the temperature should be kept between 85 and 100 degrees. We placed our tray of cultures in front of a space heater in the guest room. The room stayed pretty toasty with the door shut. I always turned the space heater off when we went to bed, for safety reasons, but the bacteria grew even with the cooler overnight temperature.
We chose surfaces that we thought might harbor bacteria, even though they looked clean.
- Dirty hands
- Clean hands (we expected this to be bacteria-free)
- Refrigerator handle
- Door handle
- Toilet seat
- Kitchen faucet
- Light switch
We looked at our germ farm each day, but let the bacteria science experiment grow for 3 full days before recording our results.

Bacteria Science Experiment Results
After 3 full days, we observed the different cultures. I couldn’t find a way to determine exactly which bacteria, mold, and yeasts we were growing without a high-powered microscope . We were able to use our microscope that connects to our TV to notice edge lines of the cultures, but nothing really detailed. That’s okay though. There was still plenty to observe.
We noticed the shape, size, and color of all the growth. The colors ranged from a cloudy white to a creamy yellow. There were even a few spots of fuzzy green.
What surprised us was the amount of microbes growing. My house is generally clean! Who knew we were surrounded by so much bacteria?
In order from least germs to the most –
- Clean hands (!)
- Fridge handle

For the most part, the bacteria amounts were a little unsettling, but likely are not harmful. There is no way for us to know if the bacteria grown is good bacteria or bad bacteria. We are rarely sick so I’m not too worried. Just a bit grossed out . I have always heard that being too clean is worse for immune systems than living around a little dirt. I guess that must be true.
We did take this as an opportunity to review proper hand-washing techniques again though. A friend, who is a nurse, suggested singing “Happy Birthday” twice as a way to not skimp on hand washing time.
Hannah and Ben drew a few of the bacteria cultures in their science notebooks and wrote a few sentences about the experiment and what they learned.
Then we sealed the cultures up in a Ziploc bag and threw them away. They were beginning to smell a bit, which I took as a bad sign. My husband joked that one day soon the bacteria would take over the house.
All in all, this was a fascinating experiment and one that we hope to recreate again soon. I would love to test surfaces out in public. Although, I’m a little afraid to see what is lurking on a Target shopping cart handle.
As an Amazon Associate I earn from qualifying purchases.
Related Posts:

Welcome! My name is Jennifer. I am a teacher at heart. Before my children were born I was a public school teacher. Now, I am a homeschooling mom of two.
Hello! Appreciate your post! My 3rd grader is attempting this project for her science fair this weekend. We did the swabs Monday. And have kept then under a lamp for the last three days but nothing has happened …..did yours get condensation?! It’s the only thing I see. 🙁 Hope we didn’t botch her project. Thank you!
Hi! We did have some condensation. The condensation formed under the lid and the bacteria grew on the agar plate. I wonder if maybe the lamp isn’t producing enough heat for the samples. Hopefully something starts to grow soon!
I’m worried about leaving a heat source on all day when we’re at work. We’re going to attempt this for the science fair. Was thinking of an aquarium with maybe two green house lights to heat, but still worried about leaving that on. Any other suggestions or thoughts???
I checked with a scientist friend and she suggested putting the bacteria samples on top of the refrigerator.
We did this with dirty hands in the classroom. I took pictures of what grew and sent them to an expert. He first reminded me not to remove the lids under any circumstances. He then told me some of what was on there. The children in my class had nasty hands. There was staphylococcus, Ecoli, and psudamonis, Just to name a couple.
Sending a photo to an expert was a great idea! It really is shocking to see what kind of germs are all around us.
Leave a Reply
Your email address will not be published. Required fields are marked *
Den här webbplatsen använder cookies för att ge dig en så bra upplevelse som möjligt. Vill du veta mer om vad cookies är och hur vi använder det. Läs mer om cookies
- Filmtjänster
Bacillakuten: Baciller och kräks

Här kan du skapa ett klipp
Obs! tidskoden blir inte alltid exakt. Klippet kan börja någon sekund före eller efter vald tid. Ange tiden i formatet, (mm:ss)
Kopiera den skapade länken till adressfältet i din webbläsare
Underhållande faktaprogram för barn om vardagssjukdomar. Varför har vi bakterier? Det blir experiment kring handtvätt och tips om hur man undviker att bli sjuk. Vi får också besöka isoleringen på ett sjukhus för att få veta vad man gör om man blir uttorkad.
Medverkande: Mikrobiologen Elisabet Holst och orkestern Bacillerna. Programledare: Petter Oest.
Bacillakuten är ett underhållande faktaprogram för de mindre barnen och deras föräldrar. Här träffar vi barn och läkare och får reda på en massa om vinterkräksjukan, förkylningar, hosta, astma och huvudvärk. Varför smakar kräks illa, hur smittar det och varför har vi bakterier? Varför måste man vara förkyld och varför är blod rött? Är det farligt att svälja snor? Varför måste man borsta mjölktänderna när man ändå ska få nya? Programledaren Petter Oest ger tips på hur du undviker att bli sjuk och hur du underlättar när du väl blivit sjuk. Det blir också experiment och besök på sjukhus.
- Produktionsland: Sverige
- Produktionsår: 2013
- Ämnen: Biologi Idrott och hälsa
- Målgrupper: Grundskola F-3 Förskola Anpassad skola
- Språk: Svenska
- Ålder från: Barntillåten
- Rek. ålder: 5 år och uppåt
- Speltid: 22 min
- Artikelnummer: 15501
- Finns även att beställa som DVD
Relaterade filmer

Evas sommarplåster – Magsjuka

Evas vinterplåster – Smitta och immunförsvar

Bacillakuten: Stukade fötter och brutna ben

Bacillakuten: Tandtroll

Bacillakuten: Hosta och astma

Bacillakuten: Magen

Bacillakuten: Halsen

Bacillakuten: Näsan

Bacillakuten: Snoppen och snippan

Vår kropp
Science Bob
- Experiments
- Science Fair Ideas
- Science Q&A
- Research Help
- Experiment Blog
more in 10-12 years
Growing bacteria for science fairs.
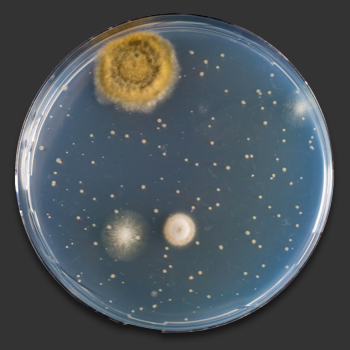
All good science experiments start with a question – this is what you want to find out by experimenting. Here are a few example questions to get you started using the scientific method for growing bacteria:
- Is a dogs mouth cleaner than a humans mouth?
- Who has the cleanest mouth in the class?
- Do antibacterial soaps really kill bacteria?
- Which door handle in the school has the most bacteria?
- Does toothpaste kill bacteria in your mouth?
- Do dark socks create more bacteria in a shoe than white socks.
- Do hand sanitizers work to kill bacteria?
- What location in the school contains the most bacteria?
- Is there more bacteria in tap water, bottled spring water, rain water, or pond water?
Step 1 – Ask A Question: Let’s imaging that you want to answer the question, “Which door handle in the school has the most germs?”
Step 2 – Research: You can’t just jump in and start experimenting. It’s important to do a little research. Ask the school nurse which door handle he or she thinks the most germs (bacteria) are. Observe and chart which door handles get the most use, survey friends and family to get opinions and write down the results. All this information will help you narrow down which door handles are the most likely to contain germs – and which ones you should choose to use in your experiment.
Step 3 – Make a Hypothesis : This is when you make a prediction based on your research. This is not an “I think…” prediction, it is a statement that will either be proven true or false based on experimenting. An example would be, “The handle to the nurse’s room contains the most bacteria.”
Step 4 – Experiment: This particular science experiment requires a simple bacteria testing kit. You would choose several door handles that you think might contain the most bacteria. These door handles are considered the Independent Variable in your experiment because each handle is independent and you control which ones are chosen. In a typical kit you would touch a separate cotton swab to each door handle, and then touch it to the bacteria growing Petri dish so that you would have one dish for each handle. Take good notes that would include when you collected each sample and where you collected the sample, and be sure to label everything well in any experiment.
Step 5- Collect Data: In this experiment, bacteria will start to grow in the Petri dish over the next few days, and you may be surprised by just how much gross bacteria is lurking in your school. Take good notes each day and determine which dish has the most bacteria growing in it.
Step 6 – Make Your Conclusion: This is when you decide if your hypothesis is correct. If your hypothesis was, “The handle to the nurse’s room contains the most bacteria,” your experiment will show if your hypothesis was right. It is not bad at all if your hypothesis is incorrect, what is important is that you answered your question from step 1. Now pat yourself on the back for your fine scientific discovery using the Scientific Method.
CLICK HERE for information about Bacteria Growing Kits.
CLICK HERE to download and print this Science Fair idea.
More Images & Video

More from my site
ADS (these ads support our free website)
Share this page.

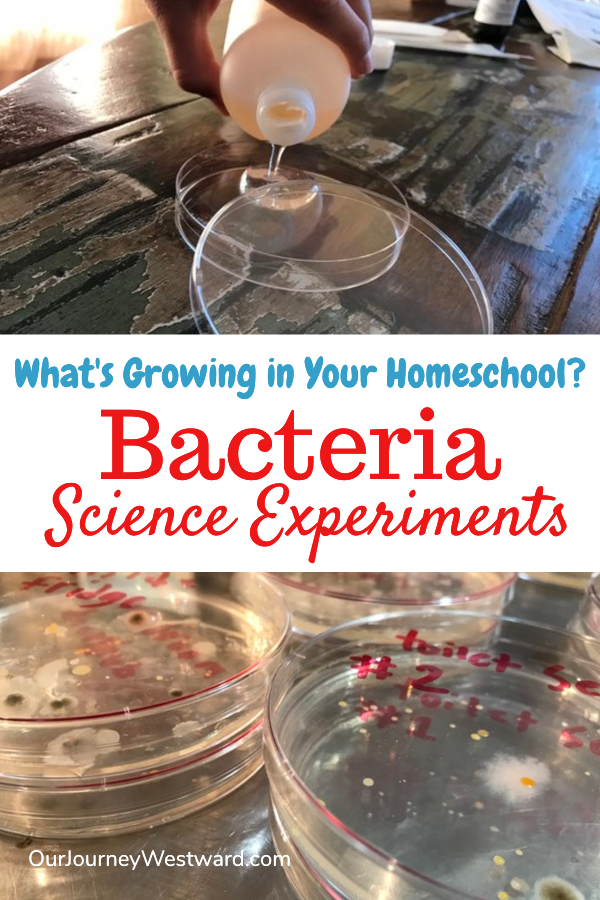
What’s Growing in Your Homeschool? Bacteria Science Experiments
Ah, fall. Beautiful weather, fun festivals, football…and the beginning of “sick season.” It’s the perfect time of year to teach middle and high school students about germs through some cool bacteria science experiments!
I’ve harped to my son for years about the importance of hand-washing to prevent illness. Now that he has actually seen bacteria with his own two eyes, he’s washing his hands more often. It’s amazing what experiential learning can teach.
Bacteria are all around us…and not all of them are bad! In fact, good bacteria are essential in our bodies to help us digest food and fight off some of the bad microbes that get in. Bacteria are also fabulous decomposers in our world and help us clean up dead things.
Bad bacteria, sometimes called pathogens, are harmful and can cause illnesses like strep, meningitis, lyme disease, or salmonella poisoning.
We certainly can’t hide from all pathogens, but as Eli and I learned through our bacteria science experiments, hand washing goes a long way in keeping them at bay.
I received free products and compensation from Home Science Tools in exchange for writing this post. As always, my opinions are strictly my own. Affiliate links are included in this post.
Making Bacteria Cultures At Home
Way before we reached the conclusion that hand washing is important for wellness, we started at the beginning with two questions.
- What is bacteria?
- How do we know it’s really there if it isn’t easily observed?
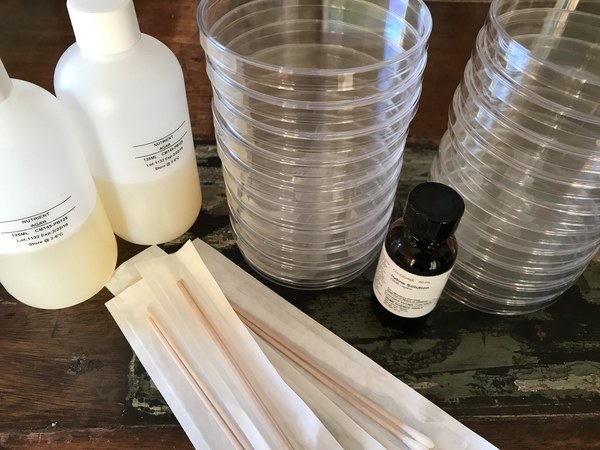
I ordered the Bacteria Growing Kit from Home Science Tools to give us a basic understanding of bacteria. It came with enough supplies to culture several bacteria samples from the air, on surfaces, and on our bodies.
To “culture bacteria” means you collect samples of bacteria (or suspected bacteria) and place them on a sterile petri dish that has been prepared with an agar solution. The agar acts as a nutrient to help the bacteria reproduce so that it can be more easily observed and identified.
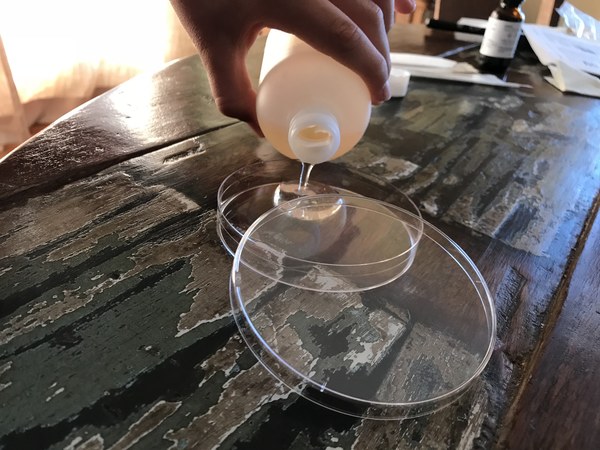
The Bacteria Growing Kit allowed us to prepare 20 of our own petri dishes with the agar solution – a cool activity in and of itself. Then following detailed instructions, we captured two bacteria samples from the air, labeled the petri dishes, and stored them in a dark place for a week to allow the bacteria to colonize – or grow.
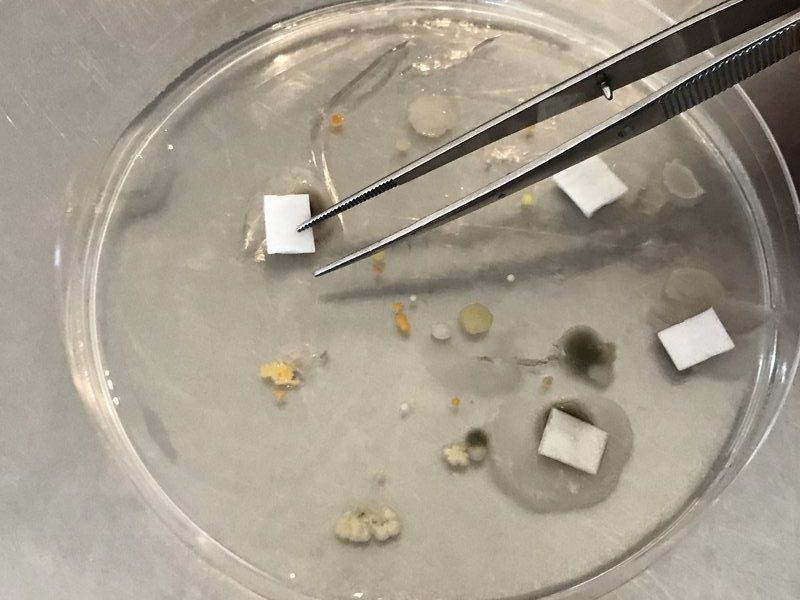
One of the petri dishes became the control, while several sensitivity squares soaked in various antibacterial chemicals were placed on the bacteria colonies in the other petri dish. After a few more days, both petri dishes were observed and conclusions were drawn based on a few leading questions provided in the direction guide.
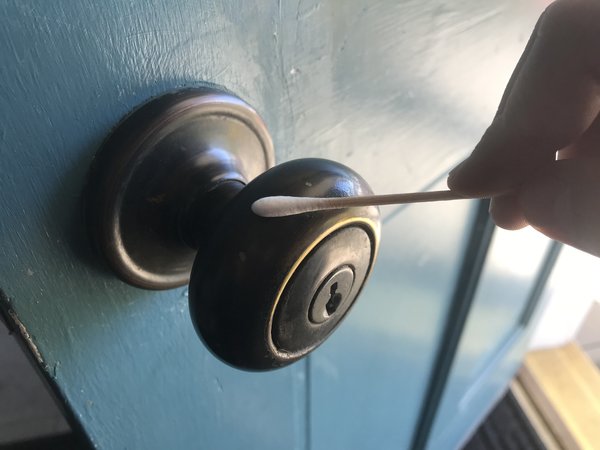
Similarly, experiments were completed for other bacteria samples where we swabbed household surfaces like door knobs, a bathroom sink, a toilet seat, and inside the refrigerator.
There were plenty of extra petri dishes that allowed for other interest-based cultures, too. A fun list of experiment ideas was included. My favorite prompted us to make two cultures from swabbing the inside of Eli’s mouth. One culture was grown from a swab before using mouthwash. The other culture was grown from a swab after using mouthwash. Eli had to note the differences to see if mouthwash had any significant effects on mouth bacteria.
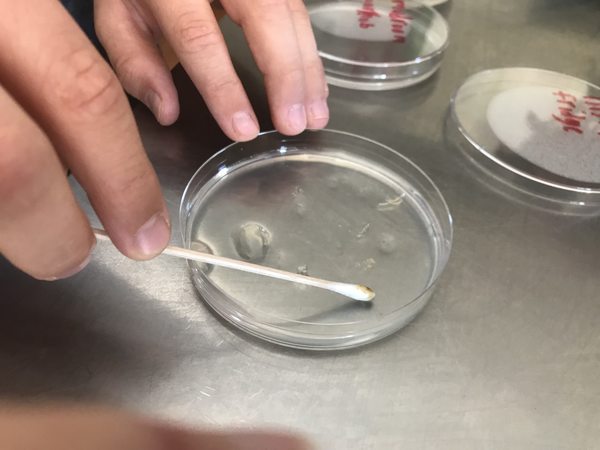
While the kit didn’t help us identify the actual bacteria colonies we had grown or whether they were good or bad, it definitely made a big impact in understanding! (If you have a microscope, you could certainly make slides and try to identify the samples from internet research.)
Most of the necessary supplies came with the kit. I had to provide disposable gloves, tweezers, and a few disinfectant chemicals like bleach, hand sanitizer, vinegar, and essential oils to soak the sensitivity squares. No biggie.
Please Note: Colonized bacteria can be dangerous. It’s VERY important to follow the kit directions closely and adhere to all the safety precautions.
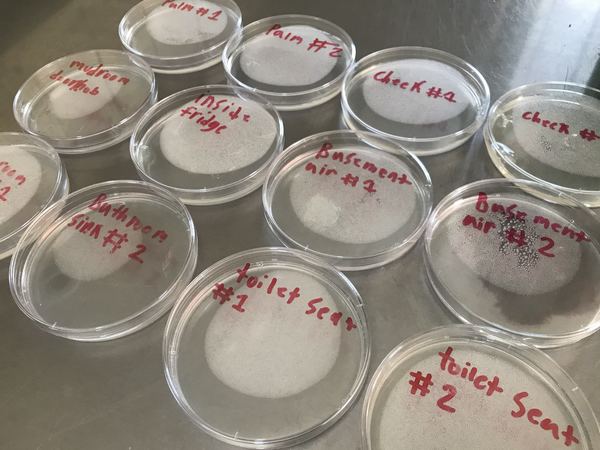
Hand Washing Bacteria Science Experiments
We were able to complete a culture of the bacteria on our hands using the Bacteria Growing Kit , but I wanted to really hit home the idea that hand washing is important. So, I ordered the Bacteria Hand Washing Experiment Kit from Home Science Tools, too.
It followed the same basic process that I mentioned above. We prepared our own petri dishes with agar solution and then collected swabs of bacteria to culture.
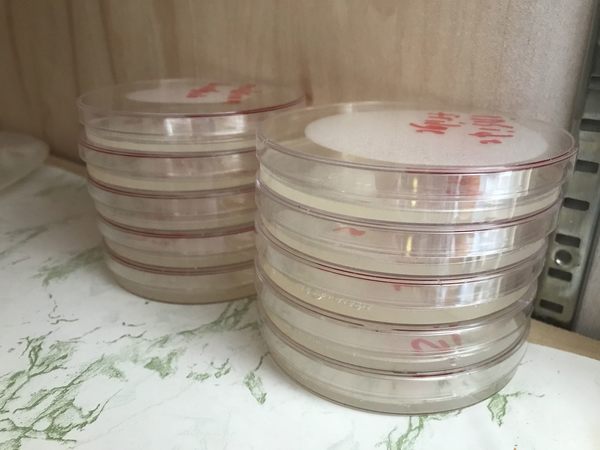
The difference is that these experiments are highly focused to test the effects of hand washing with various soaps and sanitizers.
Five helpers were necessary as one petri dish was swabbed with bacteria from each person before their hands were washed and another swab was taken after their hands were washed with one of the soaps or sanitizers we chose to use. Hypotheses were made as the petri dished were placed in a warm, dark place for a week.
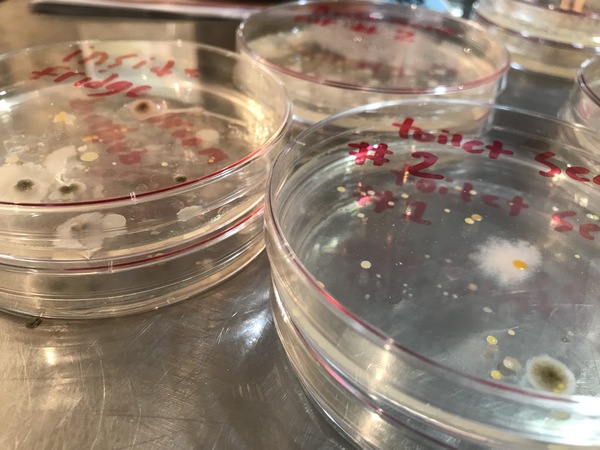
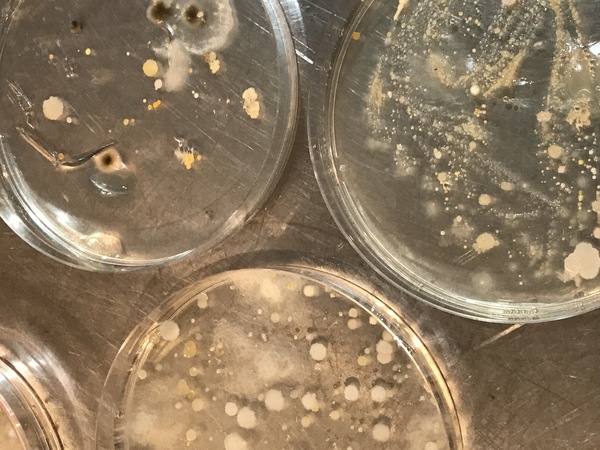
The colonized petri dishes were examined for various colonies of bacteria and a chart completed to document the results. That chart helped us determine which soap was most effective in killing bacteria.
It’s important to note again that there are good bacteria on our hands sometimes. I followed this experiment by asking Eli to research the pros and cons of antibacterial soaps/sanitizers vs. regular soap. Based on the bacteria science experiments and his research, he’s decided that hand washing with soap is indeed very important. However, it’s likely best to use regular old soap and water over antibacterial supplies as they tend to kill off too many of the good guys, too.
Hands-On Bacteria Science Experiments
As homeschoolers, it’s easy to simply read science texts and skip the experiments altogether. Even if we think experiments have value, it’s easy for us to believe watching a YouTube video of someone else doing the experiment is enough.
I get it. Experiments require extra time and effort. We have to gather supplies and clean up messes. Maybe even more importantly, we don’t often really know what we’re doing or how to explain it anyway.
But over the years, I’ve seen the importance of hands-on science experiments. They solidify understanding much like working with manipulatives does for math concepts. Additionally, they promote scientific thinking – which is actually critical thinking, orderly thinking, and discovery-based learning.
Science experiments require higher order thinking skills. And we should always strive to give our children opportunities to practice the higher order thinking skills of application, creation, evaluation, and analyzation. That’s where the real understanding and meaning in learning are!
And that’s why I love Home Science Tools . They not only make science experiments easy by providing inexpensive kits, they typically provide really great directions and explanations to make it easy.

Right now, you can get a $5 coupon to spend on anything you like at Home Science Tools! It’s my go-to place for buying science supplies.
Bacteria, Fungi, and Viruses
While bacteria, fungi, and viruses are not at all the same things, they are good topics to study at the same time since our bodies can be affected by each of them. These books can help!

While not about the human body, you can certainly study fungi in nature, too. NaturExplorers A Fungus Among Us helps you turn nature study into an inquiry-based, hands-on science lab!
And finally, here are a few of my previous posts that may interest you, too.
Shared on Facebook.com/www.capturingthecharmedlife
- Pingback: Easy and Fun Science Experiments for Kids | Fearless Homeschool
- Pingback: 20 Distance Learning STEM Activities for Kids - Look! We're Learning!
- Pingback: 8 Amazingly Easy Science Experiments Kids will Love | SpecialEdResource.com
- Pingback: 20 Marvellous Microscope Activity Ideas - Teaching Expertise
- Pingback: 56 Mind-Blowing 9th Grade Science Project Ideas - Teaching Expertise
Leave a Reply
Your email address will not be published. Required fields are marked *

Growing Bacteria in Agar Activity with Free Lesson Printable
Sharing is caring!

The ever-popular growing bacteria in agar activity is eye-opening, fascinating, and well, kind of disgusting! But it’s an activity I highly recommend for all ages. There is much to learn!
We used this kit which comes with the agar already pre-made and in petri (pitri) dishes and includes swabs. You will want to gather extra swabs and disposable gloves.

(High school content for this activity is in a separate document from the lesson printable. Both request forms are at the bottom of this post. The information in the PDF goes into more detail about bateria, antiseptics, and disinfectants. )
Not wearing shoes in the house is a big pet peeve of mine, and despite the kind reminder on the garage door mat, shoes still make it into our house sometimes. So, since we had the bacteria growing kit, we decided to end the great debate – “How much bacteria comes in on the bottom of shoes?”
We have put together a detailed lesson and printable. Some of the information may be above your child’s grade level, and some of the pages in the printable are geared towards the youngest scientists.
You will want to also check out our other printable on germs and the immune system . If you have elementary-age children, use this agar activity and printable with t he germ printable . You may also want to check out this make-a-mold-terrarium activity too.
My advice is to download the printable and use what works for your homeschool or classroom. Regardless of grade level, everyone will have fun swabbing different surfaces and watching the results grow!
Please note, this post contains affiliate links.
Table of Contents
Growing bacteria in agar petri dishes- what is microbiology.
Let’s review some microbiology background before we start growing bacteria in agar.
When most people think of the word “biology,” they think about all the amazing living beings they have seen. from the magnificent matriarchal herds of elephants to the gentle sea turtles floating through our oceans’ currents, even down to the humble dandelions that brighten up city sidewalks.
But biology is the study of all living things, and not all living things can be seen, at least with the naked eye. That’s right, there is a whole society of organisms living right under our noses – literally!

The study of these incredibly small living organisms is composed of two words, micro meaning “small” and biology meaning “the study of living things. So. this means that microbiology is the study of small living things, and that is exactly what we will be talking about in this lesson.

Salmonella bacteria under an electron microscope.

Actinomycetes bacteria under an electron microscope.
Why Study the Small Stuff & Grow Bacteria in Agar?
There are many reasons to study microbial life, both the good and the bad.
Pathogenic organisms, organisms like bacteria, viruses, cysts that cause diseases such as meningitis or tetanus, are some of the most famous microbes. We have to study them in order to understand the course of their infection, what medicines they are vulnerable to, and how they may be transmitted throughout human societies.
But, while many people believe bacteria and other microbes to be dangerous, gross, and overall undesirable, we actually cannot live without them.
There is an unending list of benefits that they provide for other living organisms, including humans, elephants, sea turtles, and even dandelions stuck in sidewalks.
Reasons Why We Study Bacteria and Microbes
Some of the reasons we study bacteria and microbes include:
- Food production and safety: Microbes are involved in food fermentation and preservation. Understanding their role helps in improving food production processes and ensuring food safety.
- Microbes can be both beneficial and harmful to human health. Studying them helps in developing treatments for infectious diseases and understanding the role of the microbiome in overall well-being.

- Many diseases are caused by or associated with microorganisms. Researching microbial life is essential for developing strategies to prevent, treat, and control infectious diseases.
- Microbes are used in various biotechnological processes, such as producing antibiotics, enzymes, and biofuels.
- Microorganisms are key in nutrient cycling, soil fertility, and waste decomposition. Understanding their functions is vital for assessing and managing environmental impact.
- Microbes are essential for maintaining ecological balance. They influence the growth of plants, the cycling of nutrients, and overall ecosystem health.
What is Agar?
Agar is a polysaccharide (puh-awl-ee-sac-uh-ride) , which is a long, fancy way to say a big sugar molecule . This sugar is obtained from algae, and humans often use it as a thickening agent in many soups, preserves, and desserts.
When dealing with microbial life in any sort of laboratory setting, scientists have to provide microbes with plenty of nutrients and space to safely grow, without risk of contamination or infection.

Agar in powder form
Many microbes are grown in nutritional broths inside test tubes, but broths can be hard to store for long periods of time. Also, they don’t allow scientists to observe the colony characteristics of bacteria, which can be really important for diagnosis and research.
To combat the issues of broth cultures, scientists will add uncultured broth and agar to either a tube or a plate, with the agar acting as a thickening agent for the broth. Tubes are best for long-term storage and allow for greater specimen storage space. However, plates are best for observation and testing.

Slant cultures of Tricophyton mentagrophytes growing on Sabourard’s agar. Photo credit: Shutterstock
There are many different kinds of agar plates. Some can be selective for or against specific bacterial traits; others may help scientists differentiate between different kinds of bacteria based on their chemical characteristics. However, some agar plates may just be enriched, meaning they don’t select or differentiate, they just provide nutrients for microbes to grow. When we are growing bacteria in agar in this experiment, we will be using LB-enriched agar plates.

Experimental Purpose of Growing Bacteria in Agar
As stated previously, there are microscopic organisms right underneath our noses. They’re also in our noses, under our fingernails, and if you have ever heard the term gut flora , that is not referring to plants that grow in your belly. Rather, it refers to the billions of microbes that have lived and developed in our intestines.
However, microbes are not found only in or on our bodies, they are found everywhere , even in places that no other organisms can even dream of living. There are entire classifications of organisms called extremophiles that live and thrive in extreme environments. For example, the organisms that live in hot springs and deep-sea hydrothermal vents are known as thermophiles . Check our resource section below for more information about extremophiles.

Thermal pools at Norris Geyser Basin, Yellowstone National Park.
In this experiment we will be growing bacteria in agar as we explore how common and numerous microbes are in our daily lives by swabbing everyday places. To do this, we will be using pre-poured agar plates, sterile cotton swabs, and our creativity to think of the oddest places where nothing except microbes could ever live in our environment.
Did you know? Scientists have isolated many of the enzymes that extremophiles, particularly thermophiles, use to survive harsh conditions. One of the most important enzymes for life is DNA polymerase, which is an enzyme that synthesizes new DNA strands off of template strands. Scientists can use the DNA polymerase from thermophiles to synthesize entirely new and isolated DNA strands from just one sample. This technique is called Polymerase Chain Reactions (PCR) and is foundational to ancestry testing, molecular forensics, and the diagnosis of genetic diseases.
What Will You Swab – Growing Bacteria in Agar
Before getting started with growing bacteria in agar, think about what you are going to swab.
In addition to testing different surfaces (ie, kitchen counter, cell phone, steering wheel, toilet handle, etc.), think about how you can test a surface before spraying it with disinfectant and after spraying it with disinfectant. When we tested disinfectant, we swabbed 1/2 of the agar with disinfectant. Once the top is back on the petri dish, draw a line down the middle and use the marker to indicate which side has disinfectant and which does not.
Additional ideas for growing bacteria in agar:
- •Swabbing a hand before washing with soap and then after.
- •Swabbing a scalp. Wipe one-half of the agar with disinfectant and leave the other side untreated. Then, take two swabs of a scalp. Transfer one swabbing to one half of the dish and a second swab to the other half of the petri dish.
- •Swab your gum line in your mouth and place it on one half of the petri dish. Then, use a mouthwash like Listerine, take a second swab, and transfer it to the other side of the petri dish. Don’t forget to label which side is which! We swabbed one half of our agar plate with the mouth antiseptic first. Then, took two swabs – one for the non-antiseptic side of the plate and a second swab for the antiseptic side of the plate.
- •Discuss dependent variables, independent variables, and control variables with your students. It will be important to keep all of the petri dishes in the same area where they receive the same temperature and light. For example, you don’t want some of the dishes in front of a sunny window and others sitting behind a nearby curtain. You want to keep all of the Petri dishes in the same area where the temperature is the same.
- •If you’re testing dirty hands vs. hands that were washed with soap before swabbing, your independent variable is whether soap is used or not. If you opt to swab inside your mouth, then if you compare swabbing before using a mouth antiseptic, like Listerine®, using antiseptic vs. not is the independent variable. What independent variables will you test?
- •The dependent variable is the bacterial growth observed in the agar petri dishes.
Procedure for Growing Bacteria in Agar

Growing Bacteria in Agar
- 1 Agar testing kit
- 1 kit Agar testing kit
- 1 piece permanent marker
- 1 copy lesson printout
- 1 pair safety glasses
- 1 pair disposable gloves
Instructions
- Determine where you will place the petri dishes while you wait for the colonies to grow. Try to place in a warm area between 78 degrees Fahrenheit and 100 degrees Fahrenheit. A warm room or incubator works well.
- Identify what you want to sample.
- Fill out the lab worksheets to label what is being tested.
- Wash hands, put on gloves, and put on eye protection.
- You will use one swab per surface swabbed.
- Run the swab over the first item or area you want to swab. Twirl the swab as you wipe to get material all over the cotton tip.
- Remove the lid from one agar plate.
- Gently roll the swab over the agar material. Do not press down too hard. Just run the swab over the agar.

- Dispose of the swab.

- Fill out the activity worksheets in the lesson printable.
- Place the petri dishes in a warm place. All of the dishes should receive the same temperature and light. The ideal temperature is between 78- and 100-degrees Fahrenheit. Do not open the dishes!

- Once the activity is complete, wear gloves and eye protection and dispose of the dishes properly. Do not open the lids. Toss all gloves and disinfect the area where the dishes were sitting.
Photo Results – Growing Bacteria in Agar

What did you learn from growing bacteria in agar? What was surprising? What swab grew the most bacteria?
In our set of swabs, the cell phone swab was the clear winner for the biggest colony of bacteria. We thought the steering wheel would have more bacteria. We tested soap vs. no soap on hands and disinfectant vs. no disinfectant too. As expected, the swabs with soap and disinfectant had fewer bacteria than the non-soap and non-disinfectant swabs.
Complete the results and observations sections in the printable.
Get the Growing Bacteria in Agar Microbiology Lesson Printable & Extra High School Reading
Input your email address, and we’ll send you the printable asap! You will be added to our email community.
Other Resources
Read more about extremophiles from the American Society for Microbiology .
An excellent PDF document on extremophiles from Scientific American .
Make a Mold Terrarium
High School Level Extra Information
We have put together a 5-page read for high school and above. This reading lesson contains more information about bacteria, disinfectants, and antibiotics. We will soon add this information as a blog post.
I hold a master’s degree in child development and early education and am working on a post-baccalaureate in biology. I spent 15 years working for a biotechnology company developing IT systems in DNA testing laboratories across the US. I taught K4 in a private school, homeschooled my children, and have taught on the mission field in southern Asia. For 4 years, I served on our state’s FIRST Lego League tournament Board and served as the Judging Director. I own thehomeschoolscientist and also write a regular science column for Homeschooling Today Magazine. You’ll also find my writings on the CTCMath blog. Through this site, I have authored over 50 math and science resources.
- Earth Science
- Physics & Engineering
- Science Kits
- Microscopes
- Science Curriculum and Kits
- About Home Science Tools
Science Projects > Chemistry Projects > How To Grow Bacteria and More
How To Grow Bacteria and More
If learning how to grow bacteria in a petri dish interests you, read on.
How Can Bacteria Help Us? How Can Bacteria Harm Us? What Are Antibacterial Agents? Experiment #1: Cheek Cell Swab Experiment #2: Testing Antibacterial Agents Experiment #3: Soap Survey Experiment #4: Bacteria in the Air Experiment #5: Homemade Yogurt More Experiment Ideas
Bacteria Overview
Bacteria are one-celled, or unicellular, microorganisms . They are different from plant and animal cells because they don’t have a distinct, membrane-enclosed nucleus containing genetic material. Instead, their DNA floats in a tangle inside the cell.
Individual bacteria can only be seen with a microscope, but they reproduce so rapidly that they often form colonies that we can see. Bacteria reproduce when one cell splits into two cells through a process called binary fission. Fission occurs rapidly in as little as 20 minutes. Under perfect conditions a single bacterium could grow into over one billion bacteria in only 10 hours! (It’s a good thing natural conditions are rarely perfect, or the earth would be buried in bacteria!)
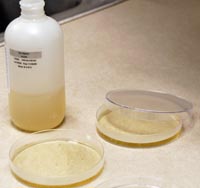
Growing and testing bacteria is a fun any-time project or a great science fair project. Bacteria are everywhere, and since they reproduce rapidly they are easy to study with just a few simple materials. All you need are some petri dishes , agar, and sterile swabs or an inoculating needle . Agar is a gelatinous medium that provides nutrients and a stable, controlled environment for bacteria growth . Most bacteria will grow well using nutrient agar , but some more fastidious bacteria (those with more complex nutrient requirements like Bacillus stearothermophilus , Branhamella catarrhalis , and Bacillus coagulans ) prefer tryptic soy agar .
You also need a source for bacteria, and this is not hard to find! You can swab your mouth or skin, pets, soil, or household surfaces like the kitchen sink or toilet bowl. If you want to study a particular type of bacteria, you can also purchase live cultures . Keep reading to see four experiments using bacteria, and many more ideas for science projects (also consider this hands-on Bacteria Growing Kit )! Adult supervision is recommended when working with bacteria.
How Can Bacteria Help Us?
Where would we be without bacteria? Well, we might not be getting bacterial diseases, but we would still be a lot worse off! Bacteria perform all sorts of very important functions, both in our bodies and in the world around us. Here are just a few.
Digestion. Our large intestines are full of beneficial bacteria that break down food that our bodies can’t digest on their own. Once the bacteria break it down, our intestines are able to absorb it, giving us more nutrients from our food.
Vitamins. Bacteria in our intestines actually produce and secrete vitamins that are important for our health! For example, E. coli bacteria in our intestines are a major source of vitamin K. (Most E. coli is good for us, but there is a harmful type that causes food poisoning.)
Food. Bacteria are used to turn milk into yogurt, cheese, and other dairy products.
Oxygen. Cyanobacteria (which used to be called blue-green algae) live in water and perform photosynthesis, which results in the production of much of the oxygen we need to breathe.
Cleanup. Oil spills, sewage, industrial waste — bacteria can help us clean all of these up! They ‘eat’ the oil or toxins and convert them into less harmful substances.
Bacteria are amazing creatures, aren’t they? They can be so dangerous and yet so important at the same time. Keep reading to see an experiment that uses good bacteria!
How Can Bacteria Harm Us?
Some types of bacteria cause disease and sickness. These kinds of bacteria are called pathogens. They reproduce very rapidly, like all bacteria. These come in many forms and can cause illnesses from an ear infection to strep throat to cholera. They can get into our bodies via our mouth and nose, or through cuts and scrapes. Some are airborne, others are found in food, resulting in food poisoning. Bacteria are also the cause of plaque buildup on our teeth, which can lead to cavities and gum disease.
Before the discovery of antibiotics, many severe bacterial diseases had no cure and usually resulted in death. Antibiotics work by destroying bacteria or inhibiting their reproduction while leaving the body’s own cells unharmed. After a time, some bacteria develop resistance to an antibiotic, and it will no longer be effective against them. Because of this, scientists are always researching new antibiotics. (Many diseases, such as chicken pox, hepatitis, or polio, are caused by viruses rather than bacteria. Antibiotics have no effect against these diseases.)
Bacterial infections are common, but many of them can be avoided by good cooking, cleaning, and hand-washing practices.
What Are Antibacterial Agents?
How do people stop bacteria from growing and spreading? They control it in two ways: by killing the bacteria cells, and by stopping the bacteria from reproducing. An agent is a solution or method which either kills or stops reproduction. Bactericides are agents that kill bacteria cells. Static agents inhibit cell growth and reproduction.
There are a variety of ways to kill bacteria or keep it from reproducing.
Physical methods:
- Sterilization. The application of heat to kill bacteria. Includes incineration (burning), boiling, and cooking.
- Pasteurization. The use of mild heat to reduce the number of bacteria in a food.
- Cold temperatures. Refrigeration and freezing are two of the most common methods used in homes, for preserving food’s life span.
Chemical methods:
- Antiseptics. These agents can be applied directly to living tissues, including human skin.
- Disinfectants. These agents are not safe for live tissues. Disinfectants are used to clean toilets, sinks, floors, etc.
- Some food preservatives are: sodium benzoate, monosodium glutamate (MSG), sulfur dioxide, salts, sugar, and wood smoke.
- Amoxycillin and Ampicillin—inhibit steps in cell wall synthesis (building)
- Penicillin—inhibits steps in cell wall synthesis
- Erythromycin—inhibits RNA translation for protein synthesis

SAFETY NOTE
While most environmental bacteria are not harmful to healthy individuals, once concentrated in colonies, they can be hazardous.
To minimize risk, wear disposable gloves while handling bacteria, and thoroughly wash your hands before and after. Never eat or drink during bacteria studies, nor inhale or ingest growing cultures. Work in a draft-free room and reduce airflow as much as possible. Keep petri dishes with cultured mediums closed—preferably taped shut—unless sampling or disinfecting. Even then, remove the petri dish only enough to insert your implement or cover medium with bleach or 70% isopropyl alcohol.
When finished experimenting, seal dishes in a plastic bag and dispose. Cover accidental breaks or spills with bleach or alcohol for 10 minutes, then carefully sweep up, seal in a plastic bag, and discard.
Preparing Culture Dishes
Before you can grow bacteria, you’ll need to prepare sterile culture dishes. A 125ml bottle of nutrient agar contains enough to fill about 10 petri dishes.
Water Bath Method – Loosen the agar bottle cap, but do not remove it completely. Place the bottle in hot water at 170-190 °F until all of the agar is liquid. To prevent the bottle from tipping, keep the water level even with the agar level.
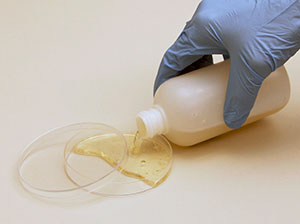
- Let the agar cool to 110-120 °F (when the bottle still feels warm but not too hot to touch) before pouring into petri dishes.
- Slide open the cover of the petri dish just enough to pour agar into the dish. Pour enough agar to cover 1/2 to 2/3 of the bottom of the dish (about 10-13ml). Don’t let the bottle mouth touch the dish. Cover the dish immediately to prevent contamination and tilt it back and forth gently until the agar coats the entire bottom of the dish. (Fill as many dishes as you have agar for: you can store extras upside down until you’re ready to use them.)
- Let the petri dishes stand one hour for the agar to solidify before using them.
Experiment #1: Cheek Cell Swab
Make a culture dish using the instructions above. Once the culture dish is prepared, use a sterile cotton swab or inoculating needle and swab the inside of your cheek. Very gently rub the swab over the agar in a few zigzag strokes and replace the lid on the dish. You’ll need to let the dish sit in a warm area for 3-7 days before bacteria growth appears. Record the growth each day with a drawing and a written description. The individual bacteria are too tiny to see without a high-power microscope, but you can see bacteria colonies. Distinguish between different types of bacteria by the color and shape of the colonies.
Experiment #2: Testing Antibacterial Agents
Preparing Sensitivity Squares
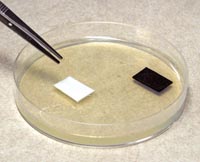
One method for testing the antibacterial effectiveness of a substance is to use ‘sensitivity squares.’ Cut small squares of blotter paper (or other absorbent paper) and then soak them in whatever substance you want to test: iodine, ethyl alcohol, antibacterial soap, antiseptics, garlic, etc. Use clean tweezers to handle the squares so you don’t contaminate them. Label them with permanent ink, soak them in the chosen substance, and blot the excess liquid with a paper towel.
Collecting Bacteria
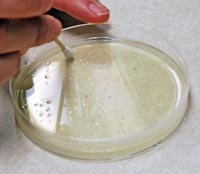
Decide on a source for collecting bacteria. For using sensitivity squares, make sure there is just one source, and keep each dish as consistent as possible. Sources could include a kitchen sink, bathroom counter, cell phone, or another surface you would like to test. Rub a sterile swab across the chosen surface, and then lightly rub it across the prepared agar dish in a zigzag pattern. Rotate the dish and repeat.
Setting Up an Experiment

Each experiment should have a control dish that shows bacteria growth under normal conditions and one or more test dishes in which you change certain variables and examine the results. Examples of variables to test are temperature or the presence of antiseptics. How do these affect bacteria growth?
- Label one dish ‘Control.’ Then in your test dish, use tweezers to add the sensitivity squares that have been soaked in a substance you wish to test for antibacterial properties. It’s a good idea to add a plain square of blotter paper to see if the paper by itself has any effect on bacteria growth. For best results, use multiple test dishes and control the variables so the conditions are identical for each dish: bacteria collected from the same place, exposed to the same amount of antibacterial substance, stored at the same temperature, etc. The more tests you perform, the more data you will collect, and the more confident you can be about your conclusions.
- Place all the dishes in a dark, room-temperature place like a closet.
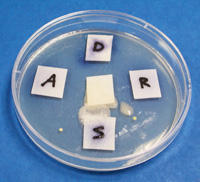
Wait 3-7 days and examine the bacteria growth in the dishes, without removing the lids. You will see multiple round dots of growth; these are bacteria colonies. Depending on where you collected your bacteria samples, you may have several types of bacteria (and even some mold!) growing in your dishes. Different types of colonies will have different colors and textures. If you have a compound or stereo microscope, try looking at the colonies up close to see more of the differences.
Compare the amount of bacteria in the control dish to the amount in the test dishes. Next, compare the amount of bacteria growth around each paper square. Which one has bacteria growing closest to it? Which one has the least amount of bacteria growing near it? If you did more than one test dish, are the results similar in all the test dishes? If not, what variables do you think might have caused the results to be different? How does this affect your conclusions?
For a variation on this experiment, test the effect of temperature on bacterial growth instead of using sensitivity squares. Put a control dish at room temperature, and place other dishes in dark areas with different temperatures.
Experiment #3: Soap Survey
Every time you touch something you are probably picking up new bacteria and leaving some behind. This is how many infectious diseases spread — we share our bacteria with everyone around us! Even bacteria that lives safely on our skin can make us sick if it gets inside our bodies through our mouths or cuts and scrapes. This is one reason why it is so important that we wash our hands frequently and well.
What kind of soap works best for cutting down on the bacteria on our hands? You can test this by growing some bacteria cultures using agar and petri dishes.
- Two (or more) petri dishes
- Sterile swabs
- Blotter paper or other absorbent paper
- Forceps or tweezers
- Different kinds of hand cleaners: regular soap, antibacterial soap, dish soap, hand sanitizer
1. Prepare the agar according to the directions on the label, then pour enough to cover the bottom of each petri dish. Cover the dishes and let them stand for about an hour until the agar has solidified again. (If you aren’t going to use them right away after they have cooled, store them upside down in the refrigerator.)
2. When your petri dishes are ready, collect some bacteria from your hand or the hand of a volunteer. (Make sure the person hasn’t washed his or her hands too recently!) Do this by rubbing the sterile swab over the palm in a zigzag pattern.
3. Remove the cover from the petri dish and lightly rub the swab back and forth in a zigzag pattern on the agar. Turn the dish a quarter turn and zigzag again. Cover the dish and repeat steps two and three for the other dish, using a new sterile swab. Label the dishes “Test” and “Control.” (You may want to do more than one test dish, so you can compare the results.)
4. Cut the blotter paper into small “sensitivity squares.” Use permanent ink to label the squares for the different types of hand cleaners you are going to test, e.g., “R” for regular soap, “A” for antibacterial soap, and “S” for hand sanitizer. Using tweezers, dip each square into the appropriate cleaner. Blot the excess cleaner on a paper towel and then place the squares on the agar in the “Test” dish. (Spread the squares out so there is distance between them.) Add one square of plain blotter paper to test if blotter paper by itself has any effect. Don’t put any squares in the “Control” dish – this one will show you what the bacterial growth will look like without any soap.
5. Put the dishes in a dark, room-temperature place like a closet and leave them undisturbed for a few days.
What Happened
The rate of bacteria growth in your dishes will depend on temperature and other factors. Check your cultures after a couple of days, but you’ll probably want to wait 5-7 days before recording your data. You will see multiple round dots of growth; these are bacteria colonies. There may be several types of bacteria growing in the dishes. Different types of colonies will have different colors and textures.
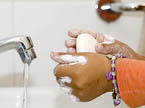
For each soap test, count and record the number of bacteria colonies in each dish. To see how effective each soap was, divide the number of colonies in the test dish by the number of colonies in the control dish, then subtract the result from 1 and write the answer as a percentage. For example, if your control dish had 100 colonies and your soap test dish had 30, the soap eliminated 70% of the bacteria: 1 — (30 ÷ 100) = .7 = 70%
According to your results, which type of soap was the most effective at eliminating bacteria? Does “antibacterial” soap really work better than regular soap? How well did washing hands in water without soap work? What further tests could you do to determine which soaps and hand washing methods are most effective at eliminating bacteria?
Experiment #4: Bacteria in the Air
You need two culture dishes for this experiment, in which you’ll demonstrate how antibacterial agents (such as antibiotics and household cleaners) affect bacteria growth.
Leave the dishes with their lids off in a room-temperature location. Leave the culture dishes exposed for about an hour.
While you wait, cut small squares of paper (blotter paper works well), label them with the names of the antibacterials you’re going to test (e.g. ‘L’ for Lysol, ‘A’ for alcohol, etc.), and soak each in a different household chemical that you wish to test for antibacterial properties. If you have time, you might also experiment with natural antibacterial agents, such as tea tree oil or red pepper. Wipe off any excess liquid and use tweezers to set each of the squares on a different spot in one of the culture dishes. The second culture dish is your ‘control.’ It will show you what an air bacteria culture looks like without any chemical agents.
Store the dishes (with lids on) in a dark place like a closet where they will be undisturbed for a few days. After 3-7 days, take both culture dishes and carefully observe the bacteria growth in each dish, leaving the lids on. The bacteria will be visible in small, colored clusters. Take notes of your observations and make drawings. You could also answer the following questions. In the control culture, How much of the dish is covered with bacteria? In the sensitivity square test culture, Have the bacteria covered this dish to the same extent as the control culture? What effect have each of the chemicals had on the bacteria growth? Did a particular chemical kill the bacteria or just inhibit its growth?
- For further study you could use an antibiotic disc set to see what different antibiotics can do against bacteria.
- For a more advanced project , learn how gram staining relates to the use of antibiotics.
Experiment #5: Homemade Yogurt
Generally when people think of ‘bacteria,’ they think of harmful germs. However, not all forms of bacteria are bad! You can enjoy a tasty product of good bacteria by making a batch of yogurt at home.
You’ll need to use a starter (available at grocery or health food stores), or else one cup of plain, unflavored yogurt that has live cultures in it. (If it contains live cultures, it will say so on the container.)
Slowly heat four cups of milk until it is hot, but not boiling or scalding. The temperature should be around 95-120 degrees to kill some of the harmful bacteria. Cool slightly, until milk is warm, and then add one cup of active yogurt or the starter.
Put the mixture in a large bowl (or glass jars) and cover. Make sure that the bowl or jars are sterilized before using by either running them through the dishwasher or washing them with very hot water.
There are two different methods for culturing the yogurt mixture: You can put the covered bowl or jars into a clean plastic cooler, and fill the cooler with hot water to just below the top of the culture containers. With this method, you will need to occasionally refill the cooler with hot water, so that the temperature of the yogurt stays consistent. The other method is to wrap the containers in a heating pad and towels, setting the heating pad on low to medium heat.
Check the mixture after heating for 3 1/2 to 4 hours. It should be ‘set up,’ having a smooth, creamy consistency similar to store-bought yogurt. If the mixture is not set up yet, heat it for another 1-2 hours. When it is the right consistency, add some flavoring—such as vanilla extract, chocolate syrup, or berries—and store the yogurt in the refrigerator. It should keep for a couple of weeks. For safety, we suggest that you do not eat any yogurt that has separated or has a non-typical consistency.
More Bacteria Experiment Ideas
Here are some other project ideas for you to try on your own or use as a basis for a bacteria science fair project:
- Mouthwash . Swab your teeth and gums and see how well toothpaste or mouthwash work against the plaque-causing bacteria on your teeth.
- Dog’s mouth : Have you heard people say that dogs’ mouths are cleaner than humans’? Design an experiment to test whether this is really true!
- Band-aid . Some band-aids are advertised as being antibacterial. Test to see if they really work better than regular band-aids at inhibiting bacteria.
- Water bottle . Is it safe to keep refilling a water bottle without washing it? Test a sample of water from the bottom of a water bottle that has been used for a couple days and compare it to a sample from a freshly-opened, clean water bottle. You can also test to see if a bottle gets more bacteria in it if you drink with your mouth or with a straw.
- Shoes . Do bacteria grow in your shoes? Is there a difference in bacteria growth between fabric shoes and leather? Do foot powders work to cut down on bacteria?
- Toothbrush . Do bacteria grow on your toothbrush? What are some ways you could try to keep it clean? Mouthwash? Hot water?
- Makeup . Some people recommend getting new mascara every six weeks because bacteria can grow in the tube. Test this by comparing bacteria growth from old mascara and new, unused mascara. You can also test how much bacteria is on other kinds of makeup.
Teaching Homeschool
Welcome! After you finish this article, we invite you to read other articles to assist you in teaching science at home on the Resource Center, which consists of hundreds of free science articles!
Shop for Science Supplies!
Home Science Tools offers a wide variety of science products and kits. Find affordable beakers, dissection supplies, chemicals, microscopes, and everything else you need to teach science for all ages!
Related Articles
Kids First Early Engineering Kits
A Perfect Blend of Fun and Learning In today’s digital world, finding the right balance between screen time and hands-on learning for kids can be a challenge. That’s why educational toys like Kids First Early Engineering Kits have become a popular choice among...
Gift for Biologists
Looking for ideas for gifts that will thrill even the most hard-to-shop-for biologists on your list, whether young or old? (Kids or having a PhD?) We have just the list for you! Read on for favorites (or find top gifts for science lovers of any kind). Biology is...

Cool Gifts for Science Lovers
Looking for the perfect gift for a kid (or adult!) on your list who loves to fiddle with, build, or learn about things? Read on for some cool gifts for any science lovers...whether they actually realize it’s science or not! Browse our best gifts for...

Meet Our HST Alumni
Celebrating Exceptional Learning For 30 years, we've shared our mission to inspire learning through hands-on science with over 1.7 million homeschoolers. Thank you for letting us be your partner in education that goes beyond textbooks or classrooms. Meet three members...
Easy STEM Activities with Paper
Easy STEM Activities with Paper Beneficial STEM activities don't always require expensive materials or fancy equipment–a tool as simple as paper can teach children a range of STEM concepts. In this article, we'll explore STEM activities using paper, from paper...
JOIN OUR COMMUNITY
Get project ideas and special offers delivered to your inbox.
Enkla kemiexperiment att göra hemma
Dessa 12 projekt använder material som du förmodligen redan har.
- Aktiviteter för barn
- Kemiska lagar
- Periodiska systemet
- Projekt & experiment
- Vetenskaplig metod
- Fysisk kemi
- Medicinsk kemi
- Kemi i vardagen
- Kända kemister
- Förkortningar och akronymer
- Väder & Klimat
Vill du göra vetenskap men inte har ett eget laboratorium? Oroa dig inte. Den här listan över vetenskapliga aktiviteter låter dig utföra experiment och projekt med material som du förmodligen redan har i dina skåp .
:max_bytes(150000):strip_icc()/slime-58ece0725f9b58ef7e83152d.jpg)
Du behöver inga esoteriska kemikalier och ett labb för att ha det bra med kemi. Ja, din genomsnittliga fjärdeklassare kan göra slime , men det betyder inte att det är mindre roligt när du är äldre.
Borax snöflinga
:max_bytes(150000):strip_icc()/Borax-snowflake-58eb05945f9b58ef7e996bd7.jpg)
Anne Helmenstine
Att göra en boraxsnöflinga är ett kristallodlingsprojekt som är säkert och enkelt nog för barn. Du kan göra andra former än snöflingor, och du kan färga kristallerna. Snöflingorna glittrar riktigt fint. Om du använder dessa som juldekorationer och förvarar dem, är boraxen en naturlig insekticid och kommer att hjälpa till att hålla din långtidsförvaring fritt från skadedjur. Om de utvecklar ett vitt fällningsmedel, skölj dem lätt men lös inte upp för mycket kristall.
Mentos och Diet Soda Fountain
:max_bytes(150000):strip_icc()/Mentos-Soda-58ece0d23df78c5162b1239d.jpg)
Detta är en bakgårdsaktivitet som bäst åtföljs av en trädgårdsslang . Mentos -fontänen är mer spektakulär än en bakpulvervulkan . Om du gör vulkanen och tycker att utbrottet är en besvikelse, byt ut dessa ingredienser.
:max_bytes(150000):strip_icc()/full-frame-shot-of-coins-660588251-8fd5d11ab0994d7d945456d67a5dc36c.jpg)
Du kan rengöra slantar, belägga dem med ärg och plåta dem med koppar. Detta projekt demonstrerar flera kemiska processer , men materialen är lätta att hitta och vetenskapen är säker nog för barn.
Osynligt bläck
:max_bytes(150000):strip_icc()/mystery-letter-58eb083f5f9b58ef7e9f975c.jpg)
Osynligt bläck reagerar antingen med en annan kemikalie för att bli synligt eller försvagar papprets struktur så att meddelandet visas om du håller det över en värmekälla. Men vi pratar inte om eld här; värmen från en vanlig glödlampa är allt som krävs för att göra bokstäverna mörka. Det här bakpulverreceptet är trevligt för om du inte vill använda en glödlampa för att avslöja budskapet kan du bara torka av papperet med druvjuice istället.
:max_bytes(150000):strip_icc()/rainbow-of-colored-fire-58eb04335f9b58ef7e964523.jpg)
Eld är kul. Färgad eld är ännu bättre. Dessa tillsatser är säkra. De kommer i allmänhet inte att producera rök som är bättre eller sämre för dig än vanlig vedrök. Beroende på vad du lägger till kommer askan att ha en annan elementär sammansättning än en vanlig vedeld, men om du eldar skräp eller tryckt material får du ett liknande resultat. Detta är lämpligt för en hembrand eller lägereld, plus att de flesta kemikalier finns runt huset (även för icke-kemister).
Sju-lagers densitetskolonn
:max_bytes(150000):strip_icc()/colorful-layered-density-column-58ece2325f9b58ef7e833d0a.jpg)
Gör en densitetskolonn med många vätskeskikt . Tyngre vätskor sjunker till botten, medan lättare (mindre täta) vätskor flyter ovanpå. Detta är ett enkelt, roligt, färgstarkt vetenskapsprojekt som illustrerar begreppen täthet och blandbarhet.
Hemlagad glass i plastpåse
:max_bytes(150000):strip_icc()/ice-cream-58ece29b3df78c5162b142d2.jpg)
Vetenskapliga experiment kan smaka gott! Oavsett om du lär dig om fryspunktsdepression eller inte, är glassen ett utsökt resultat i alla fall. Detta matlagningskemiprojekt använder potentiellt inga diskar, så städning kan vara mycket enkelt.
Varm is (natriumacetat)
:max_bytes(150000):strip_icc()/Hot-ice-58ece2f03df78c5162b14349.jpg)
Har du vinäger och bakpulver ? Om så är fallet kan du göra " het is " eller natriumacetat och sedan få det att omedelbart kristallisera från en vätska till "is". Reaktionen genererar värme, så isen är varm. Det går så snabbt att man kan bilda kristalltorn när man häller vätskan i ett fat.
Brinnande pengar
:max_bytes(150000):strip_icc()/money-to-burn-98555001-054584d5c5884f709ffb8307663777fe.jpg)
" Brännande pengar-tricket " är ett magiskt trick som använder kemi . Du kan sätta eld på en sedel, men den brinner inte. Är du modig nog att prova det? Allt du behöver är en riktig räkning.
Kaffefilterkromatografi
:max_bytes(150000):strip_icc()/coffee-filters-474723808-9eaf7d8a651346f4bb78f5089a4dfef8.jpg)
Att utforska separationskemin med kaffefilterkromatografi är ett kick. Ett kaffefilter fungerar bra, men om du inte dricker kaffe kan du ersätta en pappershandduk. Du kan också utforma ett projekt som jämför separationen du får med olika märken av pappershanddukar. Löv från utomhus kan ge pigment. Fryst spenat är ett annat bra val.
Bakpulver och vinäger Foam Fight
:max_bytes(150000):strip_icc()/bright-foam-with-shadows-1141048474-b2936911be7f4000a4a1d83efa42cbbf.jpg)
Skumkampen är en naturlig förlängning av bakpulvervulkanen . Det är väldigt roligt och lite rörigt men lätt nog att städa upp så länge du inte tillsätter matfärgning i skummet.
Titta nu: Hur man gör Silly Putty för att demonstrera kemiska reaktioner
Metodické materiály Biologie SŠ
Workshopy - laboratorní praktika pro sš, bakterie - jak uvidět neviditelné.
Střední škola
1 Úkol
1.1 základní úkoly.
1.1.1 Kultivujte bakteriální kolonie na různých živných půdách.
1.1.2 Pouhým okem pozorujte kultivované kolonie bakterií.
1.2 Fakultativní úkoly
1.2.1 Vytvořte mikroskopické preparáty různých bakterií a pozorujte pod mikroskopem.
1.2.2 Izolujte čisté bakteriální kultury a pěstujte je na šikmých agarech.
1.2.3 Zjistěte početnost bakteriální biomasy z různých vzorků.
2 Časová dotace
2.1 základní časová dotace: 5 hodin.
teoretická příprava: 1 × 1 hodina
praktická příprava (roztoky, sklo): 1 × 2 hodiny
kultivace bakterií: 1 × 1 hodiny
pozorování kolonií: 1 × 1 hodina
2.2 Fakultativní úkoly: až 6 hodin
barvení a pozorování bakterií: 1 × 2 hodiny
izolace čistých kultur: 1 × 2 hodiny
počítání bakterií: 1 × 2 hodiny
3 Pomůcky a materiál
3.1 základní pomůcky.
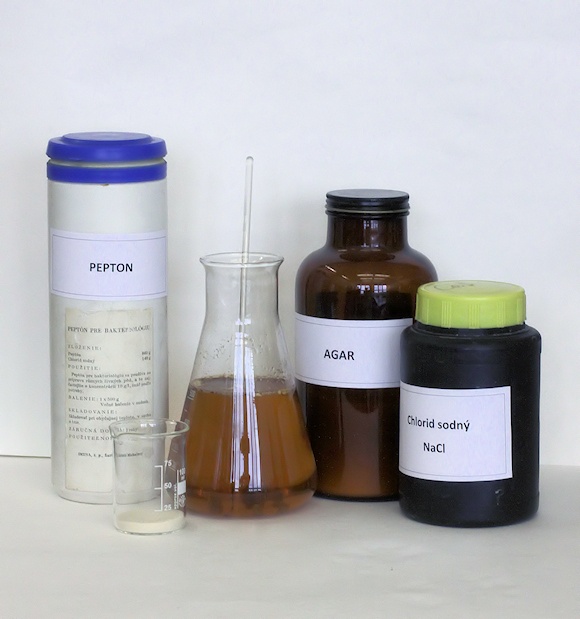
Kultivace bakterií: sterilizované[1] sklo (kádinka, 4 zkumavky, 4 Petriho misky), sterilizované[2] živné půdy, živný agar, masopeptonový bujon, hovězí bujon v kostce, NaCl, voda, pomůcky pro var, pomůcky pro vážení, vatové nebo alobalové zátky.
3.2 Pomůcky pro fakultativní úkoly
Barvení a pozorování bakterií: odmaštěná sklíčka (K 2 Cr 2 O 7 , HNO 3 , voda, saponát, filtrační papír), barvicí roztoky (safranin, Lugolův roztok, krystalová violeť – viz pracovní postup), mikrobiologická klička (platinový nebo měděný drátek na tyčince, na konci s očkem), kahan, filtrační papír, voda, mikroskop (olejová imerze, alespoň 600násobné zvětšení)
Izolace čistých kultur: sterilizované živné půdy (plotny a šikmé agary), mikrobiologická klička, kahan, hokejka (zahnutá skleněná tyčinky), etanol (sterilizace hokejek)
Počítání bakterií: sterilizované živné půdy (plotny a šikmé agary), mikrobiologická klička, kahan, hokejka (zahnutá skleněná tyčinky), etanol (sterilizace hokejek), čistá (převařená) voda
4 Hlavní a dílčí cíle
4.1 základní cíle.
4.1.1 Dokázat existenci bakterií kultivací jejich kolonií a mikroskopicky
4.1.2 Zvládnout základní mikrobiologické techniky
4.2 Vedlejší cíle
4.2.1 Naučit se barvit bakterie dle Grama a rozlišovat bakterie při pozorování mikroskopem na grampozitivní a gramnegativní.
4.2.2 Zvládnout izolaci čistých kultur bakterií.
4.2.3 Zjistit početnost živých bakterií ve vzorku kultury.
5 Mezipředmětové vztahy a přesahy
Tento materiál přesahuje svým obsahem předmět biologie. Významně se prolíná s chemií (práce s chemikáliemi, barvení preparátů, sterilizace), s matematikou (ředění kultur), s medicínou (význam bakterií).
6 Obecný úvod k tématu
6.1 kultivace baktérií.
Bakterie se vyskytují ve společenstvech tvořených mnoha druhy s obrovskou početností. Při studiu konkrétního typu bakterií je nezbytné vytvořit kolonii bakterií pocházejících z jedné jediné buňky. Taková populace jedinců vzniklých vegetativním rozmnožením se v mikrobiologii nazývá čistá kultura . Izolaci a kultivaci bakterií poprvé použil Robert Koch (1843–1910). Koch získal čistou kulturu tak, že jako živné médium použil zpevněné substráty typu agar. Na takových živných půdách se vznik kolonie projeví jako různobarevný okrsek (většinou polokulovitého tvaru) biomasy – bakteriální kolonie.
6.1.1 Aseptická práce
Při izolacích kultur a jejich kultivace je nutno zachovat aseptickou práci, která zahrnuje následující zásady:
- Práce probíhá v čisté místnosti bez průvanu, ve které se nevíří prach.
- Pracujeme vsedě, s předem připravenými pomůckami v dosahu, ideálně ve dvojici.
- Sterilní předměty (zátky, pipety) nesmí být kontaminovány; nesmí být pokládány nebo drženy za konec, který přijde do styku s bakteriální.
- Všechny otevřené nádoby (agary, baňky s půdami, apod.) držíme zásadně šikmo.
- Stejně jako vždy při práci v laboratoři zbytečně nemluvíme, nekašleme a samozřejmě dodržujeme ostatní zásady práce v laboratoři
- Práce musí probíhat efektivně, rychle a přesně – jen tak se vyvarujeme kontaminace.
6.1.2 Živné půdy pro kultivaci bakterií
Existuje celá škála živných půd pro mikroorganismy. Všechny však musí mít obecné vlastnosti, mezi které patří zdroj energie (též vodíku a elektronů), zdroje základních biogenních prvků (uhlíku, dusíku, ostatních biogenních prvků), akceptor elektronů (např. kyslík), růstové faktory, vhodné pH, vhodná teplota.
Příkladem komplexního media může být hydrolyzát kvasinek, hydrolyzát masa (pepton) nebo komplexní masopeptonový bujon.
6.1.3 Vatové zátky
Vatovými zátkami se uzavírají nádoby obsahující sterilizované živné půdy a čisté kultury naočkované na živných půdách. Zajišťují průchod dýchacích plynů a zároveň zabraňují průniku jiných bakterií. Vytváří se z napříč složeného, pevně srolovaného proužku buničité vaty, širokého ve shodě s požadovanou výškou zátky. Pro krátkodobé účely je možno hrdlo nádoby uzavírat i alobalem přehnutým kolem hrdla nádoby.
6.1.4 Sterilizace
Sterilizace je zahubení všeho živého v daném prostředí (např. v baňce, zkumavce). Systém musí být při sterilizaci ovšem uzavřen tak (vatovou zátkou), aby po skončení sterilizace nedošlo k nové kontaminaci z nesterilního okolí. Sterilizaci je možno provádět několika způsoby, např. žíháním v plameni, suchým teplem (sterilizace se provádí v horkovzdušných sterilizátorech 1 hodinu při 160 0 C), vodní parou (přičemž sterilizace horkou vodní parou je účinnější než sterilizace suchým teplem). Sterilizujeme tak všechny vodné roztoky a s vodou se mísící kapaliny. Můžeme tak sterilizovat i suché sklo (pipety, misky) i prázdné nádoby uzavřené vatovou zátkou. Vegetativní buňky hynou ve vodě při 100 0 C již za několik minut.
6.1.5 Lití ploten
Ze šikmo nakloněné baňky vyjmeme vatovou zátku, krátce v plameni ožehneme hrdlo baňky s tekutou agarovou půdou držené dnem v dlani pravé ruky, ožehneme též vatovou zátku. Jednou rukou opatrně zdvihneme víčko sterilní Petriho misky a vlijeme do ní takové množství agarové půdy, aby vznikla vrstva 3–5 mm tlustá. Nesmí dojít k potřísnění okraje misky. Petriho misku uzavřeme, znovu ožehneme hrdlo baňky i zátku a baňku uzavřeme.
6.1.6 Šikmé agary
Agar přelitý v baňce tekutou půdou rozehřejeme v horké páře a za tepla naplníme do zkumavek do výše 2 až 3 cm. Sterilizujeme a poté necháme utuhnout v šikmé poloze. Dodržujeme opět zásady aseptické práce – v tomto případě nesmí především dojít k potřísnění hrdla zkumavky a vatové zátky.
6.2 Pozorování bakterií pod mikroskopem
Bakteriální buňky nejsou v optickém mikroskopu téměř viditelné, a proto je barvíme. Každé organické barvivo se skládá ze dvou funkčních částí - chromoforu a auxochromu. Chromofor (např. skupina -NO 2 ) uděluje molekule barevnost, auxochrom (např. -OH) jí udělí disociovatelnost.
Barviva jsou obecně dvojího druhu: kyselé barvivo disociuje tak, že barevná část molekuly je aniontem, bazické barvivo tak, že barevná část molekuly je kationtem. Bazické nebo bazofilní barvivo pak baví kyselé struktury v buňce (např. jádro), zatímco kyselé barvivo bazické struktury. V bakteriologii jsou nejdůležitější barviva bazická.
Gramovo barvení je diferenciální barvení. Podle výsledku barvení dělíme bakterie na grampositivní a gramnegativní.
6.2.1 Práce s optickým mikroskopem
Mikroskop se skládá z části optické (objektiv a okulár), osvětlovací (zdroj světla, clona, kondenzor) a mechanické (stativ, stolek, tubus).
Objektiv vytváří převrácený a zvětšený obraz předmětu. Jeho ohnisková vzdálenost kolísá od 20 mm do 1,5 mm. Čím menší ohnisková vzdálenost, tím větší vlastní zvětšení objektivu podle vzorce Z = ( /fob)-(250/fok) , kde Z je celkové zvětšení, fob a fok jsou ohniskové vzdálenosti okuláru a objektivu, je optická délka tubusu mikroskopu, 250 je normální konvenční zraková vzdálenost lidského oka a f je ohnisková vzdálenost v mm.
Numerická apertura objektivu je charakteristická hodnota daná konstrukcí objektivu, a je uvedena, stejně jako zvětšení, přímo na plášti objektivu. Numerickou aperturu značíme A, lze ji vyjádřit vztahem A = n.sin α, kde α je poloviční otvorový úhel objektivu.
Hloubka ostrosti objektivu je nepřímo úměrná numerické apertuře. Čím silnější objektiv, tím menší hloubka ostrosti. Okulár dále zvětšuje obraz vytvořený objektivem, a to podle konstrukce 5x až 20x. Celkové zvětšení mikroskopu je dáno součinem vlastních zvětšení objektivu a okuláru. Je zbytečné, aby bylo větší než tisícinásobek numerické apertury použitého objektivu.
Bakterie se dobře pozorují pomocí mikroskopu s fázovým kontrastem . Bakterie se při pozorování fázovým kontrastem jeví tak, že jsou tmavé na světlém pozadí.
Obecné zásady při práci s mikroskopem při pozorování bakterií:
- Pozorování se začíná vždy nejmenším zvětšením, barvené preparáty bakterií však pozorujeme pod objektivem zvětšujícím 100× s použitím imerzního oleje.
- Pozorování začínáme sešroubováním tubusu dolů tak, až se objektiv dotkne skla na stolku mikroskopu; při tom se díváme na tubus z boku.
- Zajistíme maximální osvětlení pozorovaného místa, a co nejvíc cloníme.
- Makro šroubem posouváme tubus nahoru dokud nezahlédneme objekt, pak doostříme mikrometrickým šroubem.
- Při použití imerzního objektivu kápneme na suchý preparát malou kapku imerzního (cedrového) oleje a do něho vnoříme objektiv
- Po skončení mikroskopování pozorování imerzní objektiv ihned otřeme do sucha speciálním papírem na čočky nebo velmi jemným čistým sepraným pláténkem s použitím lihu nebo xylenu.
6.3 Izolace čistých kultur
Očkování je přenesení části populace čisté kultury (inokula) do jiné nádoby s živným médiem. Provádí se mikrobiologickou kličkou nebo pipetou.
Mikrobiologická klička musí být před použitím vypálena. Po vypálení se klička nechá na několik vteřin vychladnout nebo ji zchladíme dotykem o sterilní agarovou půdu.
6.4 Počítání bakterií
Počet (koncentraci) živých buněk v kultuře či nějakém vzorku (půda, voda, stolice) můžeme stanovit různými metodami. Často se používá ředění, které zajistí výsev kolonií vzniklých z jediné buňky. Dle známé koncentrace vzniklých kolonií a ředění lze potom odhadnout hustotu bakterií v původním vzorku.
Inkubace při ředění postačí většinou v intervalu 24 – 48 hodin. Kultivační teplota se pohybuje pro mezotermofily v rozmezí 30–37 0 C, pro psychrofily 15–25 0 C a pro termofily 50–70 0 C.
7 Pracovní postup
7.1 kultivace baktérií.
7.1.1 Příprava živných půd
Masopeptonový bujon (resp. jeho pevná forma masopeptonový agar) je klasické živné médium pro bakterie. Skládá se z následujících částí:
- masový extrakt............. 10 g
- pepton........................... 10 g
- NaCl.............................. 5 g
- agarová řasa................. 20 g
- destilovaná voda ad...... 1000 ml
NaCl, masový extrakt a pepton se rozpustí v horké vodě a roztok se následně cca 10 minut vaří. Po ochlazení se doporučuje kontrola pH a případně její upravený na hodnotu pH 7,2 - 7,4. Následně je do roztoku vložen agar, který se rozpustí a pak je celý roztok sterilizován po dobu 20 minut (obr.1).
Obr. 1 Příprava masopeptonového bujonu jako živné půdy (pepton, masový bujon, sůl, agarová řasa). Foto Pavel Vlach
Živný bujon a živný agar jsou průmyslově vyráběny v různých podobách jako hotová média, která se jen rozpustí.
Příprava : 40 g/l vody, za občasného zamíchání nechat nabobtnat agar, pak sterilizovat po dobu 20 minut (obr. 2).
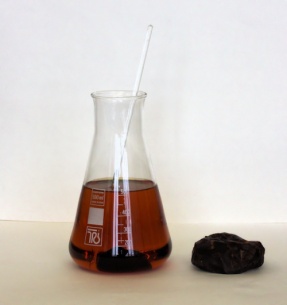
Obr. 2 Příprava živného agaru je velmi jednoduchá (viz text). Foto Pavel Vlach
7.1.2 Příprava vatových zátek
Proužek buničité vaty složíme napříč na požadovanou výšku a pevně jej zavineme. Pro krátkodobé účely je možno hrdlo nádoby uzavírat i alobalem přehnutým kolem hrdla nádoby.
7.1.3 Výroba mikrobiologické kličky
Na drátku o délce cca 5 cm (měděný, platinový) a tloušťce 0,5–1 mm vytvoříme na konci pinzetou malé očko (o průměru cca 2 mm). Na skleněnou tyčinku navlékneme bužírku (např. kousek odstřihnuté gumové hadičky) a dbáme, aby po tyčince neklouzala. Mezi bužírku a tyčinku zastrčíme konec upraveného drátku tak, aby minimálně 3 cm drátku přesahovaly skleněnou tyčinku.
7.1.4 Sterilizace půd a nádobí
- Dle návodu připravíme 500 ml živného (masopeptonového) agaru (viz 7.1.1). Po důkladném promíchání a za horka naplníme 10 zkumavek po asi 8 ml a zazátkujeme vatovou nebo alobalovou zátkou.
- Nepoužité zbytky agarové půdy v baňce uzavřeme vatovou zátkou.
- Zkumavky a agarovou půdu sterilizujeme, šikmé agary po sterilizaci necháme utuhnout v šikmé poloze (obr. 3).
- 10 pipet na 1 ml, 2 pipety na 10 ml dělené a 2 trubičky na Pasteurovy pipety. Konce pipet vkládané do úst uzavřeme smotkem vaty. Pouzdro, 5 chemických zkumavek uzavřených hliníkovou folií a ostatní nádobí vysterilizujeme.
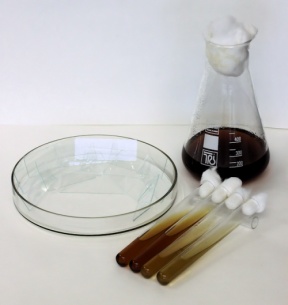
Obr. 3 Odmaštěná skla, sterilní šikmé agary, zbytky živné půdy, nalité naočkované plotny ke kultivaci – základ pro další týden mikrobiologického praktika. Foto Pavel Vlach
7.1.5 Příprava šikmých agarů a ploten[3]
Do 6 sterilních Petriho misek nalijeme horkou sterilní agarovou půdu po asi 15 až 20 ml a necháme utuhnout (obr. 4, 5 a 6). Po zatuhnutí očkujeme na agarové půdy vzorky, ze kterých chceme kultivovat bakterie. Lze doporučit kultivaci z půdy, ze vzduchu, z otisku předmětu nebo kašle, tj. např. na jednu plotnu nasypeme několik zrníček zahradní půdy, 2 plotny otevřeme a necháme odkryté: první 1 minutu, druhou 10 minut, na další plotnu nakašleme, na jinou otiskneme nějaký předmět. Po naočkování do živného média necháme bakterie cca 3-5 dní pomnožit. Běžné bakterie vyrostou při pokojové teplotě, patogenní bakterie kultivujeme při teplotě lidského těla v termostatu.
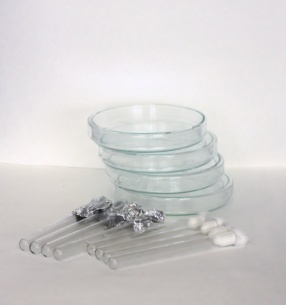
Obr. 4 Základem mikrobiologické aseptické práce je mimo jiné sterilní nádobí (Petriho misky a zkumavka a šikmé agary opatřené vatovými nebo alobalovými zátkami). Foto Pavel Vlach
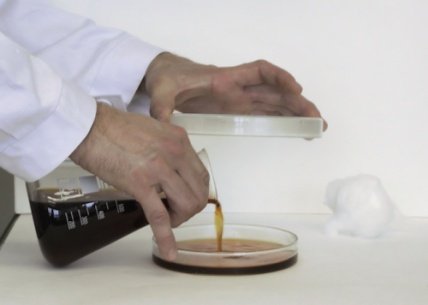
Obr. 5 Po sterilizaci živné půdy ihned lijeme plotny do Petriho misek. Foto Pavel Vlach
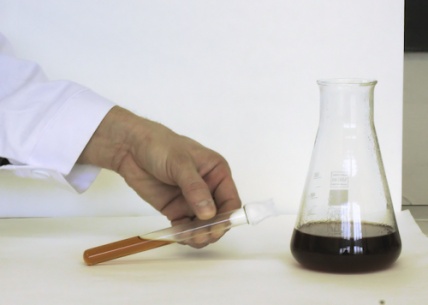
Obr. 6 Po nalití ploten lijeme šikmé agary. Foto Pavel Vlach
7.2 Pozorování bakterií pod mikroskopem
7.2.1 Čištění podložních skel
V 1000 ml vody rozpustíme 60 g koncentrované HNO 3 a 60 g K 2 Cr 2 O 7 . Do roztoku vložíme jednotlivě podložní skla a v digestoři je povaříme. Opláchneme je vodou a povaříme v roztoku saponátu (obr. 7). Poté skla důkladně propereme, opláchneme vodou a usušíme. Suchá vyčištěná skla uchováváme v dóze. Před použitím sklíčko několikrát protáhneme plamenem kahanu.
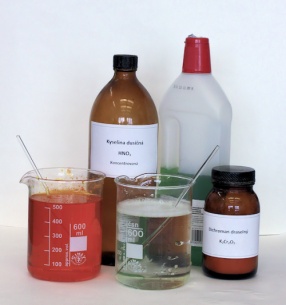
Obr. 7 Podložní skla je nutno před barvením bakterií dokonale odmastit. Foto Pavel Vlach
7.3 Zhotovení preparátu
- Na dobře vyčištěné podložní sklo protáhnuté plamenem přidáme kapku vody.
- Mikrobiologickou kličkou naneseme z plotny malé množství bakteriální biomasy do připravené kapky vody a rozmícháme na sklíčku v jemně zakalenou suspenzi. Kličkou rozetřeme suspenzi do plochy tak, aby vznikl tenký souvislý film. Ten necháme bez zahřívání na vzduchu uschnout. Posléze fixujeme protažením plamenem kahanu a barvíme dle Grama (obr. 8).

Obr. 8 Mikrofotografie bakterií barvených dle Grama.
7.3.1 Barvení bakterií podle Grama
Nejdříve připravíme barvicí roztoky.
1) Krystalová violeť
Roztok A: krystalová violeť 2 g
ethanol 20 ml
Roztok B: oxalát amonný 0,8 g
destilovaná voda 80 ml
Smíchat oba roztoky.
2) Lugolův roztok
jod 1 g
jodid draselný 2 g
destilovaná voda 300 ml
3) Safranin roztok 0,25 g
ethanol 10 ml
po rozpuštění přidat
destilovanou vodu 100 ml
- Připravený nafixovaný preparát barvíme nejdříve po dobu 90 s krystalovou violetí tak, že na preparát na podložním skle nakapeme barvivo. Podložním sklem v průběhu barvení manipulujeme nejlépe pinzetou, neboť barvivo intenzivně barví.
- Sklíčko opláchneme středně silným proudem vody z vodovodu.
- Na preparát nakapeme Lugolův roztok a necháme působit cca 60 sekund.
- Preparát opět opláchneme a osušíme přežehlením filtračním papírem.
- Osušený preparát oplachujeme 95% etanolem (mírným proudem, nejlépe ze střičky) tak dlouho, dokud masivně odchází barvivo (asi 30 s).
- Preparát pět osušíme filtračním papírem a dobarvujeme 80 s safraninem.
- I po tomto barvení oplachujeme, sušíme filtračním papírem a posléze pozorujeme olejovou imerzí.
7.4 Izolace čistých kultur
Z bakteriálních shluků připravíme čisté kultury tak, že z jednotlivých kupek bakteriálních kolonií přenášíme mikrobiologickou kličkou biomasu na čisté plotny v podobě krátkých čar, přes které po obvodu vedeme křížem jiné čáry (opakuje asi 3×). V posledním úseku budou po kultivaci jen kopečky bakteriálních kolonií, které je možno přenést na šikmé agary.
7.5 Počítání bakterií
Pro počítání bakterií je nutno kulturu bakterií naředit. Bakterie ředíme sterilní vodou sterilními pipetami v poměru 1:10 nebo 1:100 tak, abychom nakonec získali suspense zředěné 10 -5 , 10 -6 a 10 -7 .
Každé ředění ideálně pipetujeme na 2 mírně vyschlé plotny v množství 0,1 ml. Suspenzi roztíráme na Petriho misce sterilní zahnutou skleněnou tyčinkou („hokejkou“). Po 48 hodinách spočítáme kolonie, přičemž nás zajímá ředění, které dává 20 až 200 kolonií na misce. Pouze na těchto miskách spočítáme vyrostlé kolonie, spočteme průměr a po vynásobíme ředěním stanovíme počet živých bakterií v 1 ml původní kultury.
8 Metodické poznámky
Šíře předkládaných témat a jejich rozsah je samozřejmě možné redukovat podle potřeb a podmínek školy.
Sterilizaci nádobí a živných půd lze samozřejmě provádět i v tlakovém hrnci za dosažení stejných výsledků. Pouze manipulace a prostorové omezení hovoří ve prospěch použití autoklávu. Pokud řešíte jen základní úkoly tohoto tématu, lze v krajním případě od sterilizace upustit (při dokonalé přípravě půd, tj. jejich delšího převaření, při použití dobře a čistě připraveného nádobí). Je nutno počítat, že některé vzorky mohou být znehodnoceny bakteriálním plakem. I přesto lze druhý úkol, tj. barvení a pozorování bakterií mikroskopem, s úspěchem realizovat.
9 Doporučená a použitá literatura
Internetový atlas mikroorganismů. Dostupné z:
<http://www.vscht.cz/obsah/fakulty/fpbt/ostatni/miniatlas/mikr.htm>.
Kaprálek, F. 1999. Mikrobiologické praktikum. Karolinum. Praha.
Kaprálek, F. 2000. Základy bakteriologie. Karolinum. Praha.
Rosypal, S. (ed.) 2003. Nový přehled biologie. Scientia. Praha.
Mikrobiologie pro studenty 3. Lékařské univerzity. Dostupné z:
<http://mikrobiologie.unas.cz/index.html>.
[1] viz metodické poznámky
[2] viz metodické poznámky
[3] Viz metodické poznámky
Diskuze k článku
Poslední komentáře.
© 2012 – Enviroexperiment
Administrace


IMAGES
COMMENTS
Hjälp ditt barn att välja ett ämne och experiment som kan replikeras på vetenskapsmässan så att hennes publik får en väl avrundad utbildning om vetenskapen om bakterier. Glitter Germs Att illustrera hur snabbt bakterier sprids är en användbar och underhållande vetenskapsmässig aktivitet som kan göras med publikens medlemmar.
3 days ago · The book suggested taking a bacteria culture from hands, but we decided to take this bacteria science experiment a little further and culture other surfaces around our home as well to create our own little germ farm. The results were quite shocking. Bacteria Science Experiment How to Grow Your Own Germ Farm
Sep 27, 2024 · Science Fair: Rolling Dice Probability Experiment This is a fast, easy, fun probability science experiment using dice, paper, and pen! Step-by-step instructions, photos, and videos are included. 5 Fun Science Experiments About the Human Body for Kids Learn about how the human body works with these five fun science experiments. Great for kids!
Underhållande faktaprogram för barn om vardagssjukdomar. Varför har vi bakterier? Det blir experiment kring handtvätt och tips om hur man undviker att bli sjuk. Vi får också besöka isoleringen på ett sjukhus för att få veta vad man gör om man blir uttorkad. Medverkande: Mikrobiologen Elisabet Holst och orkestern Bacillerna.
Step 4 – Experiment: This particular science experiment requires a simple bacteria testing kit. You would choose several door handles that you think might contain the most bacteria. These door handles are considered the Independent Variable in your experiment because each handle is independent and you control which ones are chosen.
Nov 2, 2018 · The Bacteria Growing Kit allowed us to prepare 20 of our own petri dishes with the agar solution – a cool activity in and of itself. Then following detailed instructions, we captured two bacteria samples from the air, labeled the petri dishes, and stored them in a dark place for a week to allow the bacteria to colonize – or grow.
(µ/ý X,íZHe;4 ¦äl [•Q³mƒ^î '« ôаÍ}=;Žf ˆx-®jK¼ØGI TRf Þ‰ œ ™ M 1ÍÃ0‹_9æ !ëš ” &>¿c¢~ [¿ ª/ üåc„,é6: –¬˜ƒÍùÛ»Ý ç{¿ošÚß4ùk Óþ[®¼¨ õ„ ÿal › - ¶Ÿ|œ`°x~ç§Z æpÊÔjïVÔïak‡Oâ© »Dˆ[•â©[™Q?ijŠj j2ø›¦ 1NQ%N‡ÿ$¶G#Ø[ \Zçg ÎIEµ ¼óú‰èG£ 1ÎшúÑÈc„ˆºÂ ýÑ:¿¢Z ...
Experiment #4: Bacteria in the Air. You need two culture dishes for this experiment, in which you’ll demonstrate how antibacterial agents (such as antibiotics and household cleaners) affect bacteria growth. Leave the dishes with their lids off in a room-temperature location. Leave the culture dishes exposed for about an hour.
Apr 1, 2020 · Aktiviteter för barn Grunderna Kemiska lagar Molekyler Periodiska systemet Projekt & experiment Vetenskaplig metod Biokemi Fysisk kemi Medicinsk kemi Kemi i vardagen Kända kemister Förkortningar och akronymer Biologi Fysik Geologi Astronomi Väder & Klimat
Jan 1, 2012 · Bakterie se při pozorování fázovým kontrastem jeví tak, že jsou tmavé na světlém pozadí. Obecné zásady při práci s mikroskopem při pozorování bakterií: Pozorování se začíná vždy nejmenším zvětšením, barvené preparáty bakterií však pozorujeme pod objektivem zvětšujícím 100× s použitím imerzního oleje.